iPhone & iPad Apps for the Blind &VisuallyImpaired

Saturday, December 24, 2016

Keep your notes secure with password-protection

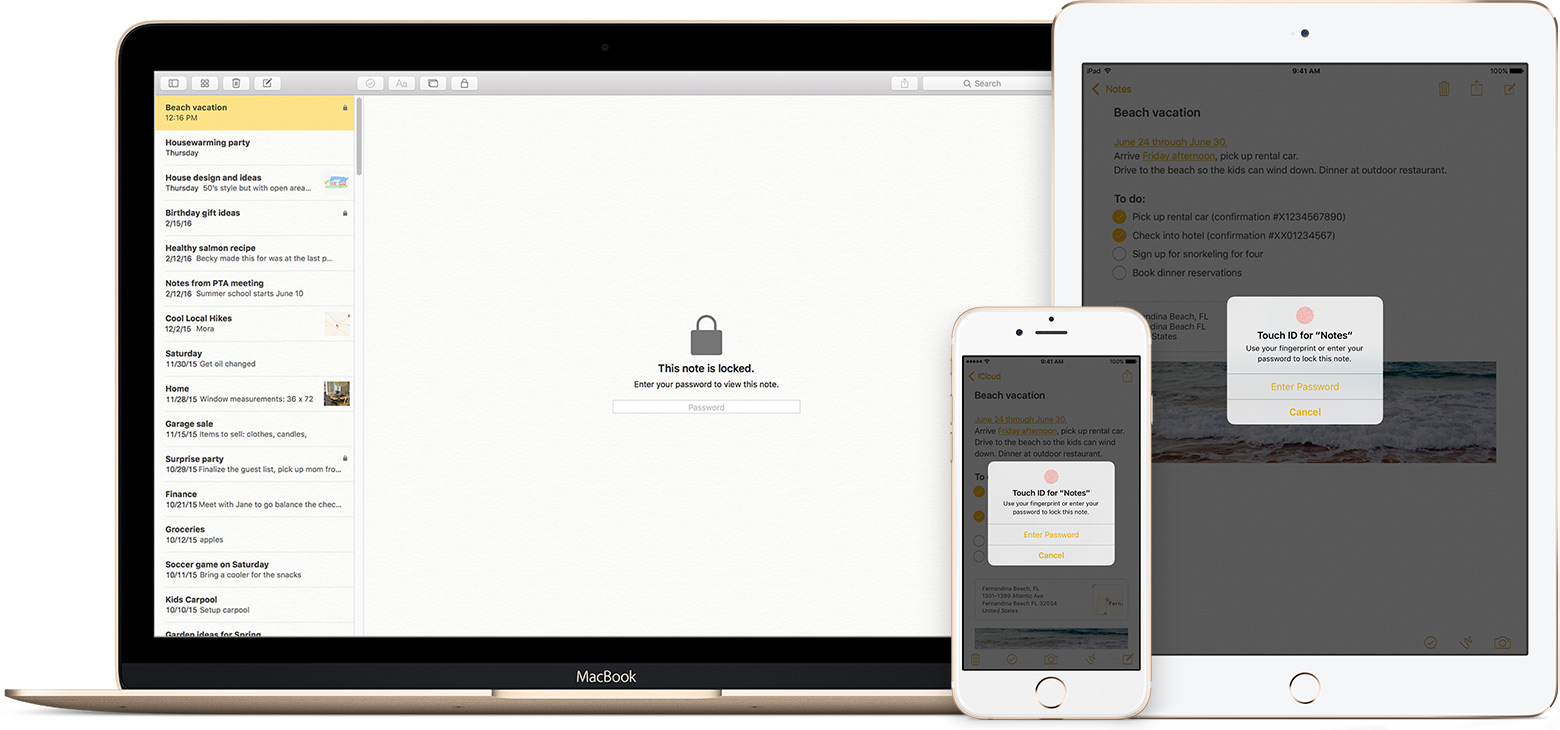
You can secure the notes that contain your most personal data—such as financial details, medical info, or website logins—with a password or fingerprint.

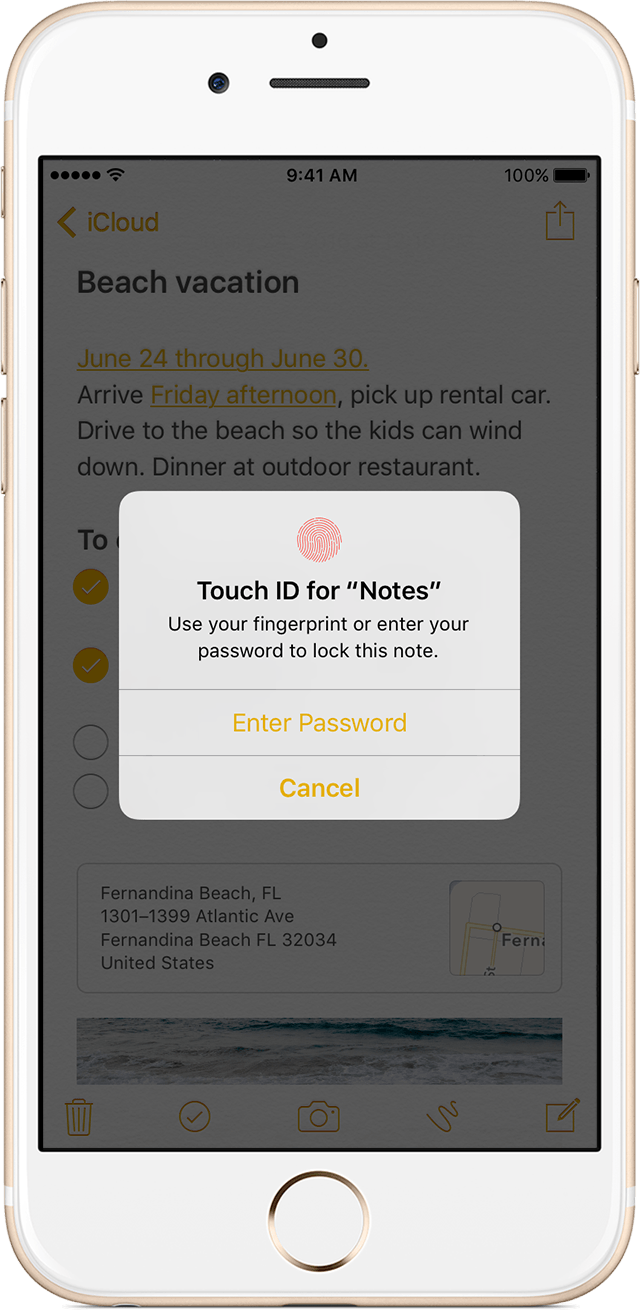
The Notes app lets you lock any note that you want to keep private from anyone else that might use your device. Notes uses a single password for all of the notes that you want to protect, on all of your devices. And if you have an iPhone or iPad with Touch ID, you can use your fingerprint to open your locked notes.

Before you begin

Set up your notes password

Before you can lock your notes, create a password that you can easily remember. If you're concerned about forgetting your password, make sure that you give yourself a password hint and that you set up Touch ID. If you forget your password, Apple can't help you reset it.
If you access your iCloud notes on more than one Apple device, you'll use the same notes password to lock and unlock all of them.

On your iPhone, iPad, or iPod touch

You can create a password in your device Settings or directly in the Notes app. Then you can turn on Use Touch ID on your iPhone or iPad, so that you can use your fingerprint to unlock your protected notes.

Create a password in Settings

  1. Go to Settings > Notes.
  2. Tap Password.
  3. Enter a password, then give yourself a password hint.
  4. Tap Done.

Create a password in Notes

  1. Open a note that you want to lock.
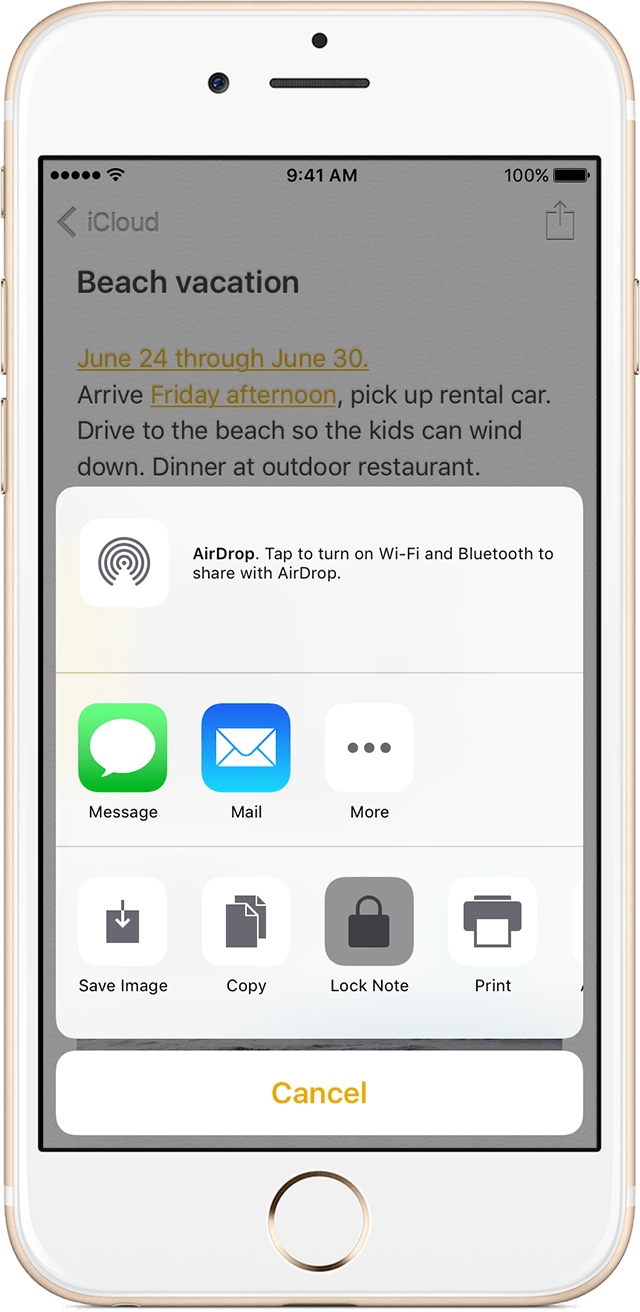
  2. Tap Share icon > Lock Note.
  3. Enter a password, then give yourself a password hint.
  4. Tap Done.

On your Mac

You can create a password on your Mac directly in the Notes app. In the menu bar, click Notes > Set Password. Enter a password, then give yourself a password hint and click Done.

Use Notes password-protection

Whether your note has an image, sketch, map, URL, or list of important information, it's simple to keep it safe with password-protection. And when you need to access your secure notes, you can tell which ones are locked directly from the Notes list. Just look for the  next to the note. Until you enter your password or use Touch ID, you only see the title and the last date that it was edited.
You can't password-protect notes that you share with someone else. If you want to stop sharing a note, open , then tap or click Stop Sharing.
     

Lock a note

On your iPhone, iPad, or iPod touch:
  1. Open the note that you want to lock.
  2. Tap Share icon .
  3. Choose Lock Note.
After you lock your note, it stays open and you'll see unlocked notes icon at the top of the screen. You can hide the note's contents when you tap .
On your Mac:
  1. Open the note that you want to lock.
  2. Click lock notes icon.
  3. Choose Lock Note.
You can only lock notes on your device and notes in iCloud. You can't lock notes that have PDFs, audio, video, Keynote, Pages, Numbers documents, or notes that use IMAP to sync (like Yahoo!, Gmail, and Hotmail).
     

Open a locked note

On your iPhone, iPad, or iPod touch:
  1. Tap the locked note.
  2. Tap View Note.
  3. Enter your password or use Touch ID.
On your Mac and iCloud.com:
  1. Click the locked note.
  2. Enter your password.
Your locked notes stay open for up to three minutes, making it easy for you to jump to another note, copy and paste information from other apps, and more. If you close the Notes app or your device goes to sleep, the note locks again.
     

Remove a lock

On your iPhone, iPad, or iPod touch:
  1. Tap the locked note.
  2. Enter your password or use Touch ID.
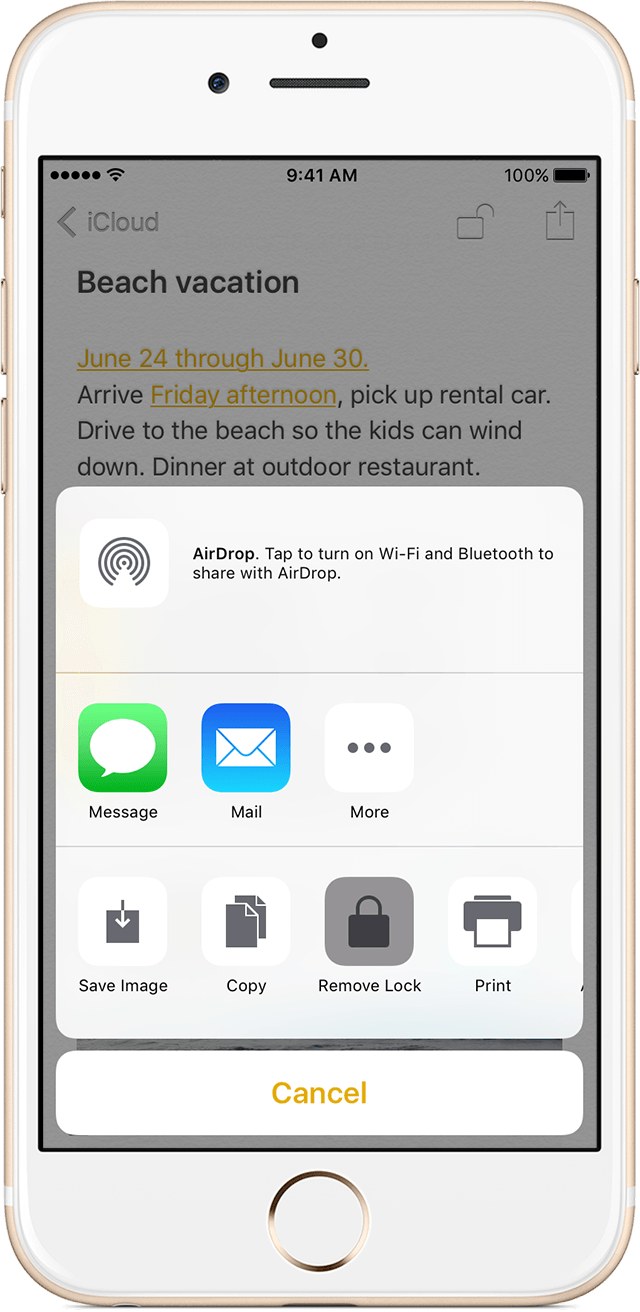
  3. Tap Share icon.   
  4. Choose Remove Lock.
On your Mac:
  1. Click the locked note.
  2. Enter your password.
  3. Click .   
  4. Choose Remove Lock.
When you remove a lock from a note, it's removed on all of the devices that you're signed in to with the same Apple ID.

Change your password

On your iPhone, iPad, or iPod touch:
  1. Go to Settings > Notes > Password.
  2. Tap Change Password.
  3. Enter your old password, then enter a new password and password hint.
On your Mac:
  1. Open Notes.
  2. In the menu bar, choose Notes > Change Password.
  3. Enter your old password, then enter a new password and password hint.
  4. Click Change Password.

If you forgot your notes password

You can unlock a note only when you enter the password that it's locked with. If you forgot your password, Apple can't help you regain access to your locked notes.
You can reset your password, but this won’t give you access to your old notes. It will, however, let you password protect any notes that you create from that point forward with the new password. This could lead to you having multiple notes with different passwords.
If you have multiple passwords, you can't tell which password you should use when you look at your notes in the Notes list. When you open a note locked by your old password but enter your current password, you'll see an alert that you entered the wrong password with a hint for your old one. If you then enter the correct old password, you get the option to update that note's password to your current one.

Reset your notes password

When you reset your Notes password, it doesn't delete or change the password of your notes that are already locked. If you have a note that uses an old password, you can update it to the new password when you enter the old password, remove the old password, then apply your new password to the note.
On your iPhone, iPad, or iPod touch:
  1. Go to Settings > Notes > Password.
  2. Tap Reset Notes Password.
  3. Enter your Apple ID password.
  4. Tap Reset Notes Password again.
  5. Enter your new password and password hint.
On your Mac:
  1. Open Notes.
  2. In the menu bar, click Notes > Reset Password > OK.
  3. Enter your Apple ID password.
  4. Click Reset Password.
  5. Enter your new password and password hint.

Tuesday, December 6, 2016

How to change your Mac computer’s name

How to change the name of your Mac

Step 1: In the Menu bar, go to  > System Preferences…
Step 2: Click on Sharing.

Step 3: In the Computer Name box, type in the name you want to use for your computer.
Step 4: Close the window, and you’re done.
As always, feel free to ask if you have any question.

Sunday, December 4, 2016

to have your iPhone announce who’s calling you running iOS 10

Among the 100+ new features in iOS 10 is the ability to have your iPhone announce who’s calling when receiving a phone call. Based on the caller ID, your iPhone will vocalize the name of the caller, or tell you it’s an unknown caller in case the number isn’t in your contacts.

This is a nice little addition that can actually be configured in the Settings.

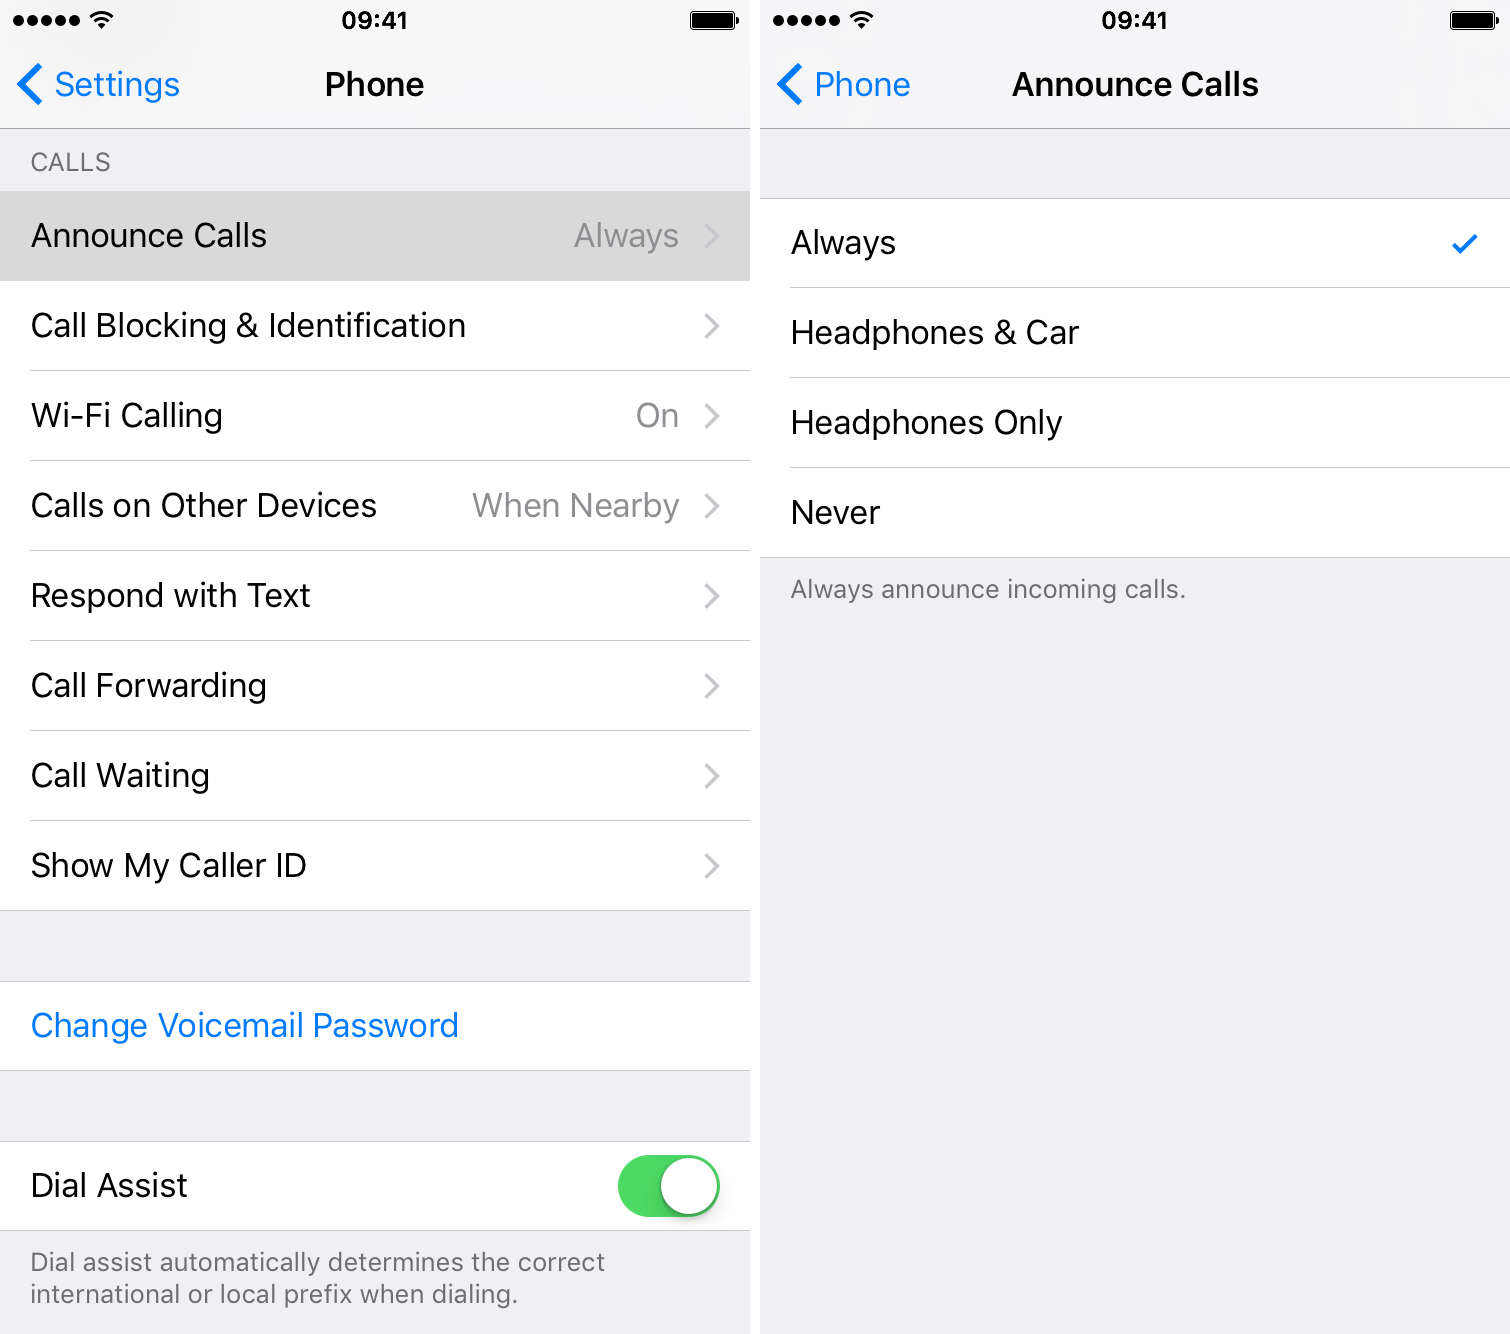
On your iPhone, launch the Settings app, and navigate to the Phone tab, then tap on Announce Calls.

announce-calls-iphone

From there you can specify under what circumstances your iPhone should announce calls. You can choose to have it name the caller for every call, only for calls received when you’re in your car or wearing headphones, only for calls you receive when wearing headphones, or simply never.

This new feature is particularly handy when walking with headphones on. You won’t have to reach for your phone to find out who’s calling. Instead, assuming the caller is in your contacts, Siri will announce the name of the caller.