iPhone & iPad Apps for the Blind &VisuallyImpaired

Wednesday, October 29, 2014

Customizing Yosemite for a Low Vision User


Those with vision problems will like OS X because it provides an array of features to make using it more comfortable. Visually-impaired Mac users can change the default sizes of on-screen print, and use the keyboard and mouse to give computer commands. You control most of these features from the Universal Access window in System Preferences.
When you click on the Universal Access icon, you see the Seeing pane, where you can control features that aid people who have trouble seeing. Note that the pane appears in large type to avoid the problem where someone with limited vision can’t use the tool to increase the type size because the tool’s type size is too small.

VoiceOver

VoiceOver is the remarkable screen reader that comes standard with every Mac. But it’s much more than a text-to-speech tool. It tells you exactly what’s happening on your Mac, and lets you fully interact with it using gestures, a keyboard, or a braille display. And it uses Alex, the voice of Mac, who speaks to you in a natural tone.
https://www.apple.com/accessibility/osx/voiceover/

Zoom

Zoom is a powerful built-in magnifier that lets you enlarge your screen up to 20 times, so you can better see what’s on the display. You can use it full screen or picture-in-picture, allowing you to see the zoomed area in a separate window while keeping the rest of the screen at its native size. The hardware acceleration engine lets you boost the size of everything on your screen — text on a web page, family photos, a place on a map.

Dictation

Dictation lets you talk where you would type — and it now works in over 40 languages. So you can reply to an email, search the web, or write a report using just your voice. Navigate to any text field, activate Dictation, then say what you want to write. Dictation converts your words into text. OS X Yosemite also adds more than 50 editing and formatting commands to Dictation. So you can turn on Dictation and tell your Mac to bold a paragraph, delete a sentence, or replace a word. You can also use Automator workflows to create your own Dictation commands.

Contrast Options

If a higher contrast or a lack of color helps you better see what’s on your display, OS X lets you invert colors or enable grayscale onscreen. Once you set your preferences, they apply systemwide, so you get the same view in every app. You can also turn on Increase Contrast to enhance definition and reduce transparency in some apps.

Cursor Size

OS X lets you magnify your cursor so it’s easier to see where you are and follow along as you move around your Mac. Set the cursor size once and it stays magnified even when its shape changes.

Here are  a bunch of articles about Yosemite – the new version of Mac OS X – which was released last week. 

Links and videos for helpful tips and tricks on customizing Yosemite
Display Options in OS X Yosemite - YouTube
https://m.youtube.com/watch?v=m1Aa6jsqwvg

Customizing Yosemite for a Low Vision User (Yosemite Accessibility Overview) | The Website of Luis Perez
http://luisperezonline.com/2014/10/18/customizing-yosemite-for-a-low-vision-user-yosemite-accessibility-overview/

Dictation Commands in OS X Yosemite | The Website of Luis Perez
http://luisperezonline.com/2014/10/20/dictation-commands-in-os-x-yosemite/

'OK, Mac': Using Automator’s Dictation Commands, new in Yosemite | Macworld
http://www.macworld.com/article/2834532/ok-mac-using-automators-dictation-commands-new-in-yosemite.html

Top 10 Hidden Features of OS X Yosemite
http://lifehacker.com/top-10-hidden-features-of-os-x-yosemite-1646774857

OS X Yosemite for the Low Vision User - Blindpodcaster | Blindpodcaster
http://blindpodcaster.com/os-x-yosemite-whats-in-store-for-low-vision-users/

rMac OS X 10.10 Yosemite Accessibility Roundup.


Tuesday, October 28, 2014

Stop iPhone Calls Ringing a Mac in OS X Yosemite

Stop a Mac ringing from iPhone calls
Perhaps you have noticed that since updating your Mac to OS X Yosemite, when your iPhone gets an incoming phone call, so does your Mac. In fact, all of your Macs running the latest OS X and using the same Apple ID will get a phone call, creating a whole chorus of ringing, just from a single iPhone call. While many users will enjoy this feature, which lets you both make and receive phone calls from an iPhone through the Mac by using the computers microphone and speakers, it can also be a nuisance if you’d rather just use your iPhone as a phone. Fortunately, this setting is easily to adjust to suit your preferences.

Do note that by stopping the Mac from ringing with an iPhone phone call, you’ll also prevent the Mac from being able to make outbound calls using the iPhone. There’s not much of a way to get around that, aside from adjusting the notification preferences for FaceTime, which we’re not going to cover specifically here.

disable calls to your iPhone from ringing on your Mac, you need to visit the FaceTime preferences. That may sound a little strange at first, but recall that FaceTime in OS X also has VOIP voice calling ability, making it a reasonable location for the setting. 
  1. Open the “FaceTime” application on the Mac
  2. Pull down the FaceTime menu and choose “Preferences”
  3. Under the primary Settings tab, uncheck the box for “iPhone Cellular Calls” 
  4. Disable iPhone cellular calls from ringing on the Mac
  5. FaceTime
  6. This will prevent the Mac from ringing and any notifications from coming to the Mac that the iPhone has a phone call. It will not impact other FaceTime features and the ability to make FaceTime audio or video calls. 
    Realistically-aiala=alally, this feature is very useful and quite nice to have, but it’s best used on a limited basis. For example, maintaining the feature on your primary iPhone and primary Mac, but disabling it on other devices.
    Many users have noticed that after they’ve updated their Mac to the latest version of OS X, and their iPad and other iDevices to the latest versions of iOS, suddenly they have an entire symphony of ringing when just their iPhone gets a call. If you’re annoyed by this on your other devices, you can also stop other iOS devices from ringing too when the iPhone gets a call.

Thursday, October 23, 2014

How to use iOS 8 Continuity between your iPhone & iPad for calls,texts, apps & more

Wen  you updated to iOS 8, recent iPhones and iPads will play nicely with each other, allowing users to do new functions like answering a phone call or sending an SMS message via their iPhone without having to put down their iPad, or start an email on one device before finishing it on the other.  
Please note that some devices are having issues using the Continuity feature. 


Apple has dubbed this seamless integration "Continuity," and some of it works immediately once all of a user's devices are updated to iOS 8. For example, if a user has the same Apple ID and associated phone number enabled on their iPad, calls will show up on the tablet once the iPhone begins ringing.

Answering a call on an iPad automatically places the conversation in speakerphone, allowing the iPad's microphone and speakers to handle the call. Continuity requires an iPhone 5 or later, fourth-generation iPad or newer, iPad mini, or fifth-generation iPod touch.


iOS 8 also allows users to automatically enable Personal Hotspot from a nearby iPhone, in a feature Apple calls "Instant Hotspot." A Continuity-capable iPhone will appear under the Wi-Fi section of the Settings app on iPad, and selecting that device will switch Personal Hotspot on, allowing a user to access mobile data from their cellular provider when possible.


The iPad also gains the ability with iOS 8 to send traditional SMS text messages via a connected iPhone. Previously, users could only said iMessages to Apple devices. While SMS messaging was available to test in iOS 8 beta releases, it is not included in the final release, and Apple has said it will become active in October.

All of this same functionality will be coming to newer Bluetooth Low Energy capable Macs later this year with the launch of OS X Yosemite, which will also be a free update.


Additional Continuity features in iOS 8 are available by enabling the "Handoff" feature. Users can do this by opening the Settings application, choosing General, and then selecting "Handoff & Suggested Apps."

"Handoff lets you start something on one device and instantly pick it up on other devices using your iCloud account," Apple's description reads. "The app you need appears in the lock screen, app switcher, and the dock on a Mac."


For example, if a user is reading a website on their iPhone running iOS 8, they can quickly switch to their iPad by swiping up from the small Safari icon that is displayed in the lower right corner. Doing so will immediately open the same website on the iPad.

In addition to Safari, this functionality works immediately with Mail, Pages, Numbers, Keynote, Maps, Messages, Reminders, Calendar, and Contacts. Developers will be able to add Handoff into their own third-party apps as well.


The "Suggested Apps" function also utilizes a user's location to recommend applications. For example, if a user is at a Best Buy retail store, iOS 8 will display an App Store icon in the lower left corner of their iPhone lock screen. Swiping up will take the user to the App Store listing for the official Best Buy app.

If the Best Buy application is already installed, the icon for it will be displayed in the lower left corner, giving the user quick access to the app while they are in the store. This will help expand iBeacon functionality, which requires third-party applications to be installed to access unique functions.

Tuesday, October 21, 2014

how to enabling Text Message Forwarding on your other Apple devices


When Apple first announced iOS 8 and its Continuity features, one of the most exciting features was SMS sharing. When this is activated, an iPhone owner will receive text messages on all of his or her Apple devices.

Before you can find the proper settings to set up SMS sharing, you'll need to update your Mac to OS X 10.10 Yosemite, and any iOS devices you own to iOS 8.1. Additionally, all Apple devices you plan on enabling this feature for will need to be signed in to the same iCloud account. Note this feature only works with iPhone five series and the six series iPhone.

All right, now that you're updated and all signed in, let's enable the feature on your iPhone.

You can see devices you've enabled for Text Message Forwarding and disable and enable the feature on your iPhone by following these steps. 
  • 1. Launch the iPhone Settings app.
  • 2. Scroll down and tap on MessagesEnable iMessage if you currently have it turned off. It has to be turned on for SMS sharing to work.
  • 3. Tap on Text Message Forwarding.
A list of your iCloud devices will show up, with an On/Off switch for each one. When you move a switch to the On position, you'll need to have the corresponding device nearby.

A short code will display on the device, and your iPhone will display a prompt asking for the code. This extra step assures you that your text messages are going to be sent to a device without  that your want.

After entering the code, you will begin to receive text messages sent to your iPhone on the appropriate device or devices. The conversation color schemes from iOS carry over to OS X, with green bubbles representing a text message and blue ones indicating iMessage.

Another important note: this will only occur when both devices are connected to the same Wi-Fi network; yet another security feature.
 Any non-iPhone devices that wouldn't otherwise be capable of sending regular text messages will be able to send and receive SMS through your iPhone in the Messages app. 

Saturday, October 18, 2014

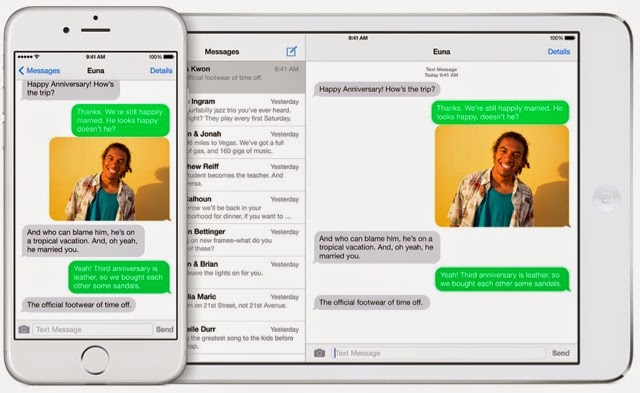
With iOS 8 Messages, you can easily control h Here’s how to messagemultiple people, name a conversation and leave a conversation in iOS 8Messages.

With iOS 8 Messages, you can easily control how the messages look and how you interact in the conversation. Here’s how to message multiple people, name a conversation and leave a conversation in iOS 8 Messages. 

1. To send a group message in iOS 8 Messages, tap on the new messages icon and enter in the contacts you want to message.


2. Then to give the message a name, tap the Details link and fill in the Group Name. The Details area also will show you where the people are, if they are sharing their location.


3. You can mute notifications in the Details area by sliding on the Do Not Disturb bar. When you’re available to chat again, just slide it off.


4. If you need more people in the conversation tap the plus to add a contact.


5. If you want to remove someone, slide to the right on their name and tap delete.


6. If you want to leave the conversation, scroll to the bottom of the Details area and tap Leave this Conversation.


Sunday, October 12, 2014

Messages. Actually LOL. OL.

FI'm Messages.
Actually LOL. OL.

Look forward to doing amazing new things with the app you use most. In iOS 8, Messages has fun, useful, even surprising features that will change the way you think about messaging.

Add your voice to the conversation.

Messages in iOS 8 makes it easy to capture any sound — your voice, a song, or a big laugh — and make it part of the conversation. Simply touch and hold the new microphone button to record your message. Then swipe to send it.

Tap to Talk, then send instantly.

Touch and hold with your thumb to record your message, then swipe up to send it.

Lift to your ear to listen.

To hear a message, simply hold iPhone to your ear and listen like it’s a phone call. Or just tap the Play button.


Send a video quickly and easily.
The new Messages app lets you share what you’re seeing almost as you’re seeing it. Quickly send a video of your brother’s first time paddleboarding. Or your dad joining the fire dancers at the luau. When you do, you’ve said so much more than “Having fun on our vacation.” And you’ve said it in seconds.

Take charge of group messages.

Start a group conversation and give it a name like “Soccer Team” or “Road Trip.” Easily include who you want, drop who you don’t, and leave the conversation whenever you want. Or turn on Do Not Disturb and then read through the messages when you have time Give your conversation a name Tap Details to name a conversation so you can easily find it again later Control the conversation. Politely. In Details, you can add and remVove people from the conversation — or leave it yourself.

Share your location in the middle of the conversation.
“Where are you?” Answer that question more clearly than ever with a map showing your location. You can also share your whereabouts with people you choose for an hour, until the end of the day, or indefinitely. And you can see people in the message thread on a map if they’ve shared their locations.

Sharing is easy.
Tap to choose how long you’d like to share your location.
So that’s where everyone is.
When your friends choose to share their locations, you see them all on one map.


Tap to see every attachment from a conversation.
It’s simple to browse the photos and videos within a thread. You’ll see all the photos and videos going back to the very first exchange, without having to scroll through earlier messages.


Tuesday, October 7, 2014

Android versus IOS Part One

Android versus Apple IOS
For those who are blind or visually impaired there are many different things we can purchase to help us function on a day-to-day basis. This article is going to cover android versusApple iOS. 

When you are blind or visually impaired trying to decide what kind of cell phone or tablet to get is a little more difficult. Right now Android and Apple are the two main devices that are out there and they work great. we want to attempt to educate you on both devices so you can make an informed decision on which one suits your needs. Please note that you should always go out and play with both before making a decision there is no substitute for hands-on experience. We will be covering Android and  Apple IOS in more detail in separate postings.

You have  a little more freedom with Android. Such as You can install other synthesizers. Not just what Apple makes available. For example, the $20 Eloquence synthesizer. course the android article pool cover more in detail what you can do regarding its operating system.

Screen Reader— VoiceOver on iPad is much more comprehensive than an Android Talks.
VoiceOver will read webpages while Android Talks will not. voiceover will read books to students. Books can be purchased from iBooks, Amazon.com, or Google Play Store. On iPad over 4 million books can be read aloud. None of these books can be read aloud on Android  The exception for Android   is that it can read public domain books, that's all. VoiceOver can read email. Talks cannot.

Book share: Both devices can read Book share books. Apple IOS uses Read2Go app Android uses Go Read app. The Read2Go app offers a better control over speech rate and color of text and background.
The one place where Android shines is in the Swype Keyboard. It has word prediction. This means word prediction in any text field. Apple iOS8 does  have word prediction. One must buy specific apps on IOS.  like Co:Writter to get word prediction.

Pinch and Zoom is much better on iOS than Android. When pinch and zoom does not work iOS offer a Zoom feature that magnifies the whole screen. Android offers the Zoom feature but it only magnifies part of the screen and is less effective. And now iOS has a feature called speak screen which android does not. 

Apple iOS now has switch control build in. Android requires purchase of additional hardware for switch control e.g. Tecla Shield.
Apple iOS has Braille keyboard support. Android does not.
There are a number of apps that are the same for iOS and Android. However, over all, the apps work much better on iOS than Android.  

Article written by Ashley Nemeth and Chelsea Stark

Friday, October 3, 2014

Navigating your iOS device part one And voice over gestures For iOS device part one

Although Apple has designed the iPhone, iPod touch, and iPad to be simple to learn, sometimes you may want a primer on the basics. Here’s a breakdown of the major multitouch gestures, navigation, Home screen tips and tricks you’ll need to master your iOS device.  Part two Will cover Using the Notification bar, dock, Home screen tips,The multitasking bar, Multitasking shortcuts and the search field.
Gestures and Techniques
If you’ve never before owned a multitouch device from Apple, you may be unfamiliar with crazy phrases like pinch-to-zoom and the difference between flick and swipe. Have no fear: While some of these gestures may have odd names, they’re easy enough to pick up.


You can tap to open apps, bring up controls, make choices from menus, and more.

Tap: As clicking is to a desktop computer, so is tapping to an iOS device. Tapping is the most common and basic gesture.
Double-tap: Tap an object twice in succession to effect a double-tap. Double-taps are primarily used for zooming in or out on text.
Tap, hold, and drag: For some functions, such as highlighting text, copying and pasting, or deleting and moving apps, you’ll need to tap and hold down on the screen. When you do this on a piece of text, it will highlight in blue, and editing handles—vertical lines with blue dots—will appear on either side of the highlighted area. You can tap, hold, and, while holding down, drag your finger to increase or decrease the selection. Dragging also comes into play for moving objects in apps, drawing, and swiping and flicking.


Drag your finger across the screen, up, down, left, or right, to swipe.

Flick and swipe: Swiping is one of your primary navigational tools: You use a left or right swipe to move through app pages on your Home screen or images in the Photos app; you use an up or down swipe to read text in Safari, iBooks, Newsstand, or elsewhere. It’s one of the easiest gestures to learn. A flick is just like a swipe, only faster: Your device supports inertial scrolling, which means that the faster or slower you move your finger, the faster or slower content will move. If you want to get to the bottom of a page quickly, just flick your finger upward in a fast motion.
One note of caution: All flicking and swiping on your device is inverse, meaning that when you move your finger down (in other words, swipe down), you’re actually moving whatever is on the screen upward. This makes perfect sense in the real world, but coming from a computer, where scrolling down on a trackpad or mouse actually scrolls the window down, it can be a bit disorienting at first. Why make the clarification? In this book, we refer several times to “swiping right” to bring up a left-hand navigational bar—which can be confusing to
parse, if you don’t know about inverse gestures.


To zoom in or out, you’ll use the pinch gesture (also referred to as pinch-to-zoom).

Pinch: To zoom in or to open something, place your thumb and index finger, pinched together, on screen and spread them apart. To zoom out, do the reverse: Start with your thumb and index finger outwards, and then pinch them together.
Rotate: You can even rotate some elements with two or more fingers. Just place two fingers on the screen and make a circular gesture, clockwise or counterclockwise.
iPad 2or above -specific multitasking gestures: If you own an iPad 2 running iOS, you can use additional gestures to multitask on your device, which include a four- or five-finger swipe and pinch. (You can read more about the iPad's multitasking gestures onMacworld.com.)

Voice Over Gestures
1 finger tap (touch) = select item under your finger
1 finger double tap = activates selected item
1 finger double tap and hold = drags the item
1 finger flick right = move to next item
1 finger flick left = move to previous item
2 finger single tap = pause or continue speech
2 finger double tap = answers phone call, hangs up phone call, starts dictation, stops dictation takes a picture, starts and stops timer, starts and stop music, starts and stops video recording
2 finger double tap and hold = set custom label
2 finger triple tap = item chooser **
2 finger scrub = escapes current context
2 finger flick up = read page starting at top
2 finger flick down = read page starting at selected item
3 finger single tap = speak page number or rows being displayed
3 finger flick right = scroll left one page, unlock phone
3 finger flick left = scroll right one page
3 finger flick up = scroll down one page
3 finger flick down = scroll up one page
4 finger double tap = initiates voice over help
ZOOM Controls
3 finger double tap = initiate zoom
3 finger double tap and hold = move finger s up to increase magnification
3 finger double tap and hold = move fingers down to decrease the magnification
When in zoom use three fingers to explore the pages

Thursday, October 2, 2014

New in iOS 8: Start Text-To-Speech Easily with Speak Screen

iOS 8 includes some new accessibility features and many improvements to existing features. One of the new features is called Speak Screen which allows users to quickly have text on the screen spoken aloud using text-to-speech. Speak Screen is included in addition to Speak Selection which allows users to highlight text and press speak to have content read aloud.


Unlike Speak Selection, which requires text to be highlighted first, before reading the text aloud,  Speak Screen does not require users to highlight the text they wish to have spoken. Especially for longer articles or emails, this highlighting process could be time consuming and frustrating.

Speak Screen solves the problem by speaking all text on the screen with a simple two-finger swipe down from the top of the screen. After swiping down with two fingers, text starts to be read aloud with text-to-speech, and the Speak Screen menu appears on top of your current app. This menu allows you to stop and start speech, adjust the text-to-speech speaking rate, and navigate through the text being spoken.  Instead of having to re-highlight text if you want to hear a paragraph again, Speak Screen offers simple navigation buttons. The menu can also be hidden to allow full view of the screen and accessed again through a small floating button. Just like Speak Selection, Speak Screen has the option to highlight text as it is spoken, making it easier for sighted readers to follow the text as it is being spoken.

Just like all of the accessibility features in iOS 8, Speak Screen can use the Alex text-to-speech voice which many users prefer. While Alex is a very high quality text-to-speech voice beware, it takes up almost one gigabyte of storage. Speak Screen can also be activated through Siri by saying "speak the screen." To enable Speak Screen on a device with iOS 8 go to Settings > General > Accessibility > Speech and then toggle on Speak Screen. Speak Screen is only available for devices running iOS 8 or higher.