iPhone & iPad Apps for the Blind &VisuallyImpaired

Showing posts with label Medical ID. Show all posts

Wednesday, April 1, 2015

Navigating your iOS Device

Navigation Basics
Now that you’ve taken your first step into the iOS world with multitouch gestures, it’s time to learn how to navigate your device. We’ll go over where your apps are stored, how to organize them, search for them, and delete them.
The Home screen: When you first turn on your device, you’re brought to the Home screen. Here, you’ll see an assortment of icons grouped into rows, and several more icons grouped in the silver Dock along the bottom of the screen. The Home screen is where your apps live, and where you can launch them. Because only 16 apps will fit on one Home screen (20 on the iPad), you can have multiple app pages or screens for organizing your apps (up to 11). Above the Dock, you’ll see a series of dots, with one highlighted in white; these dots signify the number of app pages you have. Swipe left or right to go from page to page.
The Dock: The silver translucent bar along the bottom of your Home screen is called the Dock. If you’ve tried swiping between app pages, you’ll notice the icons in the Dock don’t change. That’s because the Dock is for apps you most frequently use; instead of having to swipe from page to page to find an app, you can drop it directly into the Dock for easy access. You can store up to four apps in the Dock.
Search in Spotlight: You can search for every email message, webpage, and app on your device, or search through Google or Wikipedia, by swiping right on your Home screen until you reach Spotlight. (If you're on the first Home screen page, pressing your Home button also summons the Spotlight screen.) To search, just type your query in the text box at the top.
Open and close an app: Want to launch an app? To open it, all you have to do is tap its icon. Once it’s open, you can return to the Home screen at any time by pressing the Home button.


Tap and hold on an app icon to enter edit mode, where you can rearrange apps, add them to folders, and delete third-party programs from your device.

Rearrange and delete apps: To rearrange the order of your icons, tap and hold any icon on the Home screen. After a few seconds, all your app icons, including the one you’re holding, will start to wiggle, and a small black X will pop up in each icon’s top left corner. Once they do this, you can rearrange any apps on the Home screen, or even drag them into or out of the Dock. If you’ve installed a third-party app you don’t want anymore, you can tap the X to delete it (you cannot delete the apps that came preinstalled on your device). When you’re finished, press the Home button, and your icons will stop wiggling and stay in their new location. You can also rearrange your icons and Home screen pages through iTunes when you connect your device to your computer.
Note that you’re not able to delete the built-in apps that come with your iOS device. These include Camera, Photos, YouTube, Clock, Weather, and the all-new Newsstand folder, among others. You’ll be able to tell which apps you can’t delete—they don’t sport the black X. You are able to move around these built-in apps to your liking, however.
Use folders: Having a bunch of apps scattered on your Home screen is OK if you don’t have too many, but when you start amassing a collection, you can use app folders. A folder is a group of apps, represented by a single icon, on your Home screen. Each folder sports miniature icons representing the apps inside, along with an overall name. When you tap a folder, the Dock fades and slides down, making room for a view of the folder’s contents. Within, you’ll find the name and icon for each app. Tap any app to launch it, or tap anywhere outside the folder to return to the Home screen.
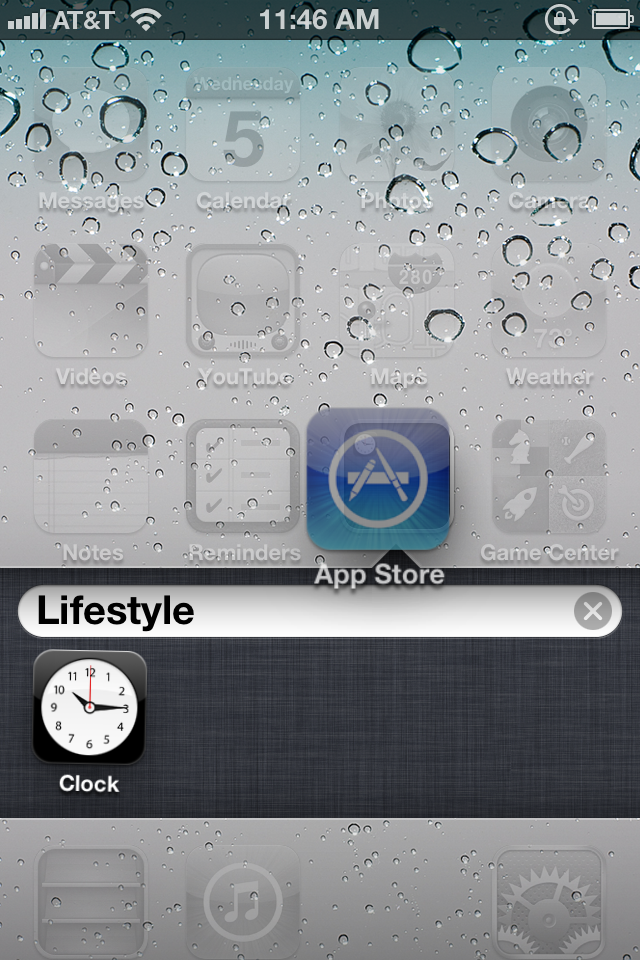

Drag an app icon on top of another app icon to create a folder.

To create a folder, start by tapping and holding any app icon to enter edit mode; after the icons begin to wiggle, drag an app on top of another app. When you release the app, you’ll create a folder, which will open and display both apps. By default the folder is named based on the App Store category for one of the first two apps in the folder. If you want to customize this name, just tap inside the field (while still in edit mode) and enter something new. When you’re done, press the Home button to exit edit mode.
To add another app to the folder, reenter edit mode and drag the desired app onto the folder icon. Repeat until you’ve added all the apps you want (up to 12 per folder on the iPhone or iPod touch; 20 on the iPad), and then press the Home button to exit edit mode.
To edit the folder itself, its name, contents, or the layout of the apps inside, you can either enter edit mode and then tap the folder, or, while the folder is open, tap and hold any icon inside. You can then tap the folder’s name to change it, drag apps within the folder to rearrange them, drag an app out of the folder to return it to the Home screen, or tap an app’s Delete button to completely delete it from your device. Unlike apps, folders don’t have a Delete button; to delete a folder, you must remove all the apps from it.
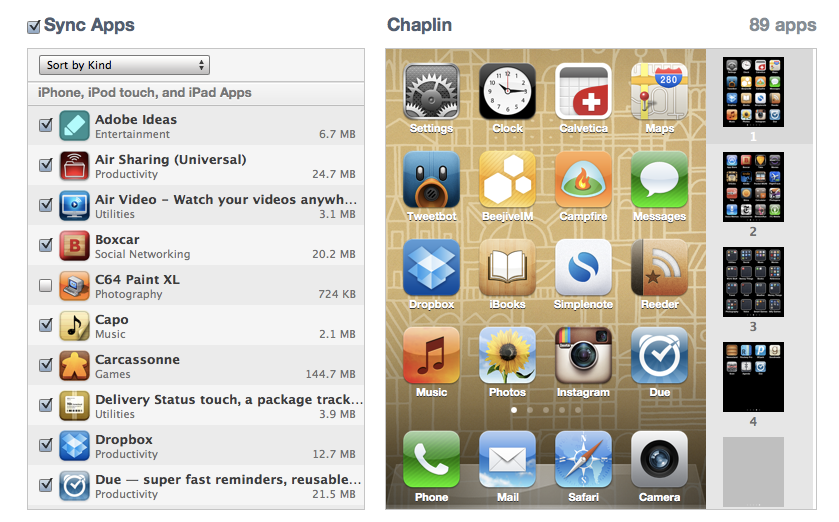

You can rearrange your apps, add folders, and remove programs through iTunes.

Manage folders from iTunes: iTunes has long allowed users to manage installed apps when syncing, and you can edit your folders too, using your mouse and keyboard. When your device is connected to your computer, the Apps tab in iTunes lets you choose which apps to sync, as well as decide how to organize these apps. Drag an app onto another app and, after a slight delay, a folder is created—just as if you’d performed the same action on your device. You get the same editable folder name, and you can rearrange icons within the folder. Since you’re using a computer, you don’t need to click and hold to enter the jiggling-icon edit mode; you can click and drag anytime. Similarly, to edit an existing folder, just double-click it.

Multitask on your iOS device

Opening and closing an app is easy: Tap the app to open it, and then press the Home button to close it. But when you exit, you’re not actually shutting down the app: You’re freezing it in place, or sending it to run in the background. This means you can have multiple active apps running at any one time, and you can even switch between active apps without returning to the Home screen.
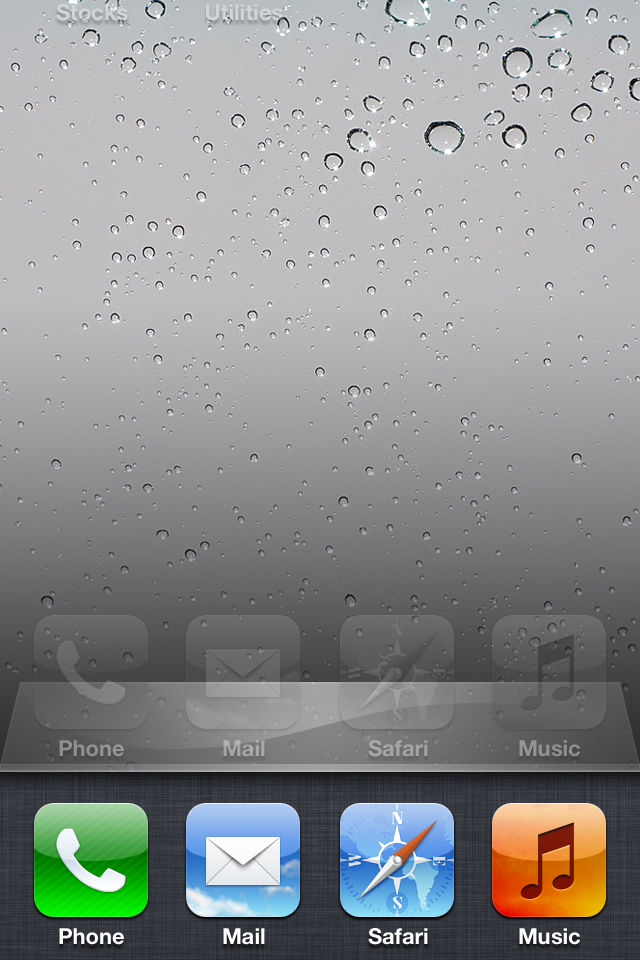

Double press the Home button to pull up your device's multitasking bar.

Frozen apps versus background apps: Sometimes you need an app to keep doing something when it’s not in the foreground. For that reason, Apple allows apps to perform tasks in the background using several tools. One of these tools is the push-notification system; another allows music apps to keep playing while the user switches to another app; yet another allows tasks, such as photo uploads, to continue running in the background even if you switch out of the program performing the upload. If your third-party app doesn’t incorporate one of these background features, it will “freeze”, which is to say it will remember whatever you were just doing when you re-open it, but will not process any data in the background.

The multitasking bar: You can quickly switch between apps by bringing up the multitasking bar. To do so, quickly double-press the Home button; a bar below the Dock will rise up from the bottom of the screen, showing off the apps most recently run. To switch to a different app, tap its icon.
Multitasking shortcuts: In addition to holding a list of your most recently used apps, the multitasking bar has a couple of other neat shortcuts for your device. 
If you swipe up from the bottom with one finger, you’ll bring up a secondary set of controls. On the iPhone or iPad, you can control the music currently playing on your device,  (it defaults to the Music app, but you can also control music from third-party apps). 
device's brightness, slider for controlling volume.  Airplane mode, wi-Fi, bluetooth, do not disturb, AirDrop, flashlight, Calculator, camera, lock.

Thursday, September 25, 2014

In iOS 8, Medical ID could be a life-saver

Apple iOS 8 Health app

he Health app in iOS 8 has an area for medical information that could be critical to your safety in an emergency. Credit: Apple

Privacy concerns shouldn't stop you from filling out the info in the Health app

Of all the new features in iOS 8, one hasn't gotten a lot of attention -- and it's the one feature that all iOS 8 users should at least consider.

I'm talking about the Medical ID record in the new Health app. Even if you aren't tracking fitness, diet or sleep -- and fortunate enough not to be managing or monitoring a chronic condition like diabetes, COPD or heart disease -- this is one aspect of the health app worth understanding. Althoughall other HealthKit-related functions are on hold for now, Medical ID is fully baked and ready to use.

The Medical ID pane of the Health app is a pretty generic medical information and history form. It contains much of the data that you'd see requested on a form when you visit a new doctor or an urgent care center -- birthdate, existing medical conditions, notes about those conditions or your medical history, allergies (to drugs, foods and environmental factors), medications you're taking, emergency contact (including relationship to you), blood type, whether you're an organ donor and your height and weight. The app automatically pulls your name and photo from the iOS Contacts app.


Medical ID info screen
When you first click on the Medical ID icon in the Health app, you'll see this screen.

To add to or edit that information, launch the Health app, tap on the Medical ID icon (lower right part of the screen), and then click the Edit button at the top. For the most part, all you'll see are text fields where you can type in the appropriate information. The exceptions are the items at the bottom of the pane for adding one or more emergency contacts, which brings up your contact list and allows you to select from a list of predefined relationships and the fields for blood type, organ donor, weight and height -- all of which provide scroll lists of possible entries.
Having that information readily available when you need to provide it during an appointment or treatment is certainly a time-saver, and it ensures that you include everything that's relevant. That isn't where the real value of this feature lies, however.
The real power and value is the option at the top of the pane labeled Emergency Access, which sports a switch to allow access to the Medical ID panel from the lock screen of your iPhone. This means that in an emergency when you're unconscious or otherwise unable to speak or unlock your phone, an EMT, some other first responder or an emergency room staff person will be able to access the information. The same is true for friends, family members or co-workers who may come to your assistance.
They can do so by using the Swipe To Unlock Gesture and tapping the emergency button instead of entering a passcode. Traditionally, this has only allowed someone to call 911 (or the local emergency services number in another country). If you allow lock screen access to the Medical ID panel, however, there will be a Medical ID button to the lower left of the keypad. Tapping that button calls up a non-editable version of the Medical ID panel. In addition to viewing this information, the emergency provider -- or whoever is accessing the information -- can also dial your emergency contact(s) simply by tapping on them.
This is a great resource for emergency workers and first responders, particularly if you have serious or chronic medical conditions that could cause a collapse (hypoglycemia if you're diabetic, for example) or that could affect diagnosis and treatment. It's also a critical source of information on allergies you may have -- particularly allergies to medications or any allergy that can be severe or life-threatening -- because it increases the chances that your condition will be diagnosed appropriately and that treatment (like a dose of epinephrine for severe anaphylaxis) will be provided quickly.
Equally important can be information about medicine you're taking that may cause side effects or interact adversely with other medications an emergency physician might use to treat you.
The medical notes section can be used to keep a record of a range of important details, including recent surgeries or other medical interventions, implanted medical devices and previous hospitalizations. Notes can even be used to indicate the existence of advance directives like a do-not-resuscitate order, a living will or a healthcare proxy. If you observe a particular religion, you could even put in a request for an appropriate member of the clergy to be called if you're critically ill or injured.
You can include your doctor(s) as emergency contacts, something that's helpful in general, but particularly important if you are seeing a specialist for a serious medical condition such as cancer, because emergency personnel may need additional information from that specialist.


Medical IDApple
A sample Medical ID (filled out) from Apple's website.

Even if you don't have any serious medical conditions, using this feature to list your name and your emergency contacts can still be worth the effort. After all, healthy people get into accidents and experience unexpected medical emergencies all the time. This option can also be a useful tool for parents to ensure that they are contacted right away if something happens to one of their children.
There is, of course, a caveat: Allowing lock screen access to the Medical ID panel could be a privacy concern. After all, anyone who has access to your iPhone can access this information -- even people who aren't medical professionals, emergency personnel or close friends or relatives. One thing to keep in mind, however, is that someone must have physical access to your phone to look at the information -- and if your phone is lost or stolen, the possibility that a stranger may be reading about your medical history isn't likely to be your biggest concern. Locating the device or wiping it using Find My iPhone would be your top priority.
If you have serious health issues or allergies, it's a no-brainer that making this information easily available is worth the minimal privacy risk. If that's not the case, you can limit the information that you present and disable access from the lock screen. (If privacy is a concern, you should know that Apple separates your Medical ID information from other Health app data and doesn't allow it to be shared with other apps that access HealthKit.) Or you can decide not to use it at all.
In the end, it's your private medical information and you have control of how to use it -- or not -- on your iPhone.