iPhone & iPad Apps for the Blind &VisuallyImpaired

Showing posts with label iphone6. Show all posts

Saturday, December 24, 2016

Keep your notes secure with password-protection

You can secure the notes that contain your most personal data—such as financial details, medical info, or website logins—with a password or fingerprint.
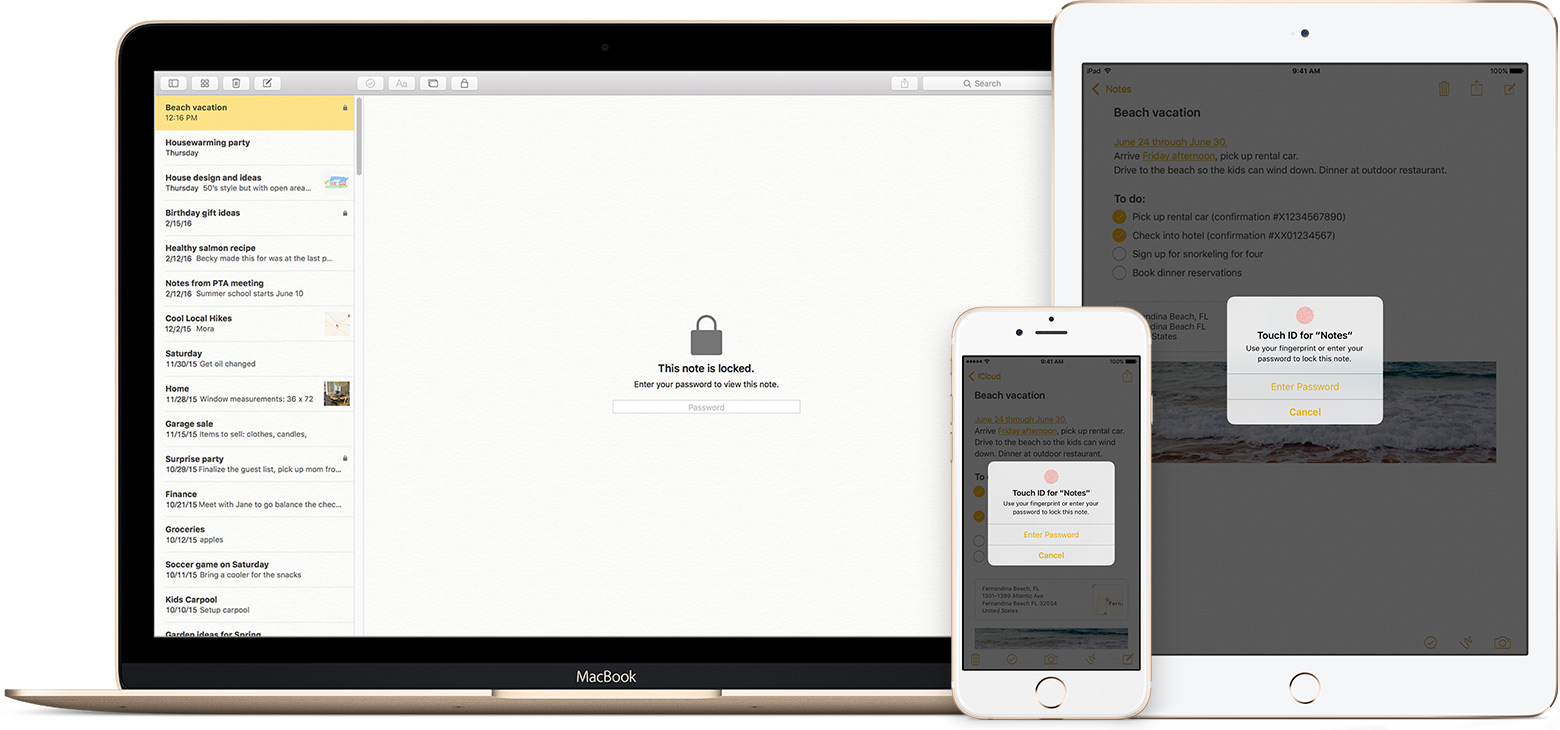
The Notes app lets you lock any note that you want to keep private from anyone else that might use your device. Notes uses a single password for all of the notes that you want to protect, on all of your devices. And if you have an iPhone or iPad with Touch ID, you can use your fingerprint to open your locked notes.

Before you begin

Set up your notes password

Before you can lock your notes, create a password that you can easily remember. If you're concerned about forgetting your password, make sure that you give yourself a password hint and that you set up Touch ID. If you forget your password, Apple can't help you reset it.
If you access your iCloud notes on more than one Apple device, you'll use the same notes password to lock and unlock all of them.

On your iPhone, iPad, or iPod touch

You can create a password in your device Settings or directly in the Notes app. Then you can turn on Use Touch ID on your iPhone or iPad, so that you can use your fingerprint to unlock your protected notes.

Create a password in Settings

  1. Go to Settings > Notes.
  2. Tap Password.
  3. Enter a password, then give yourself a password hint.
  4. Tap Done.

Create a password in Notes

  1. Open a note that you want to lock.
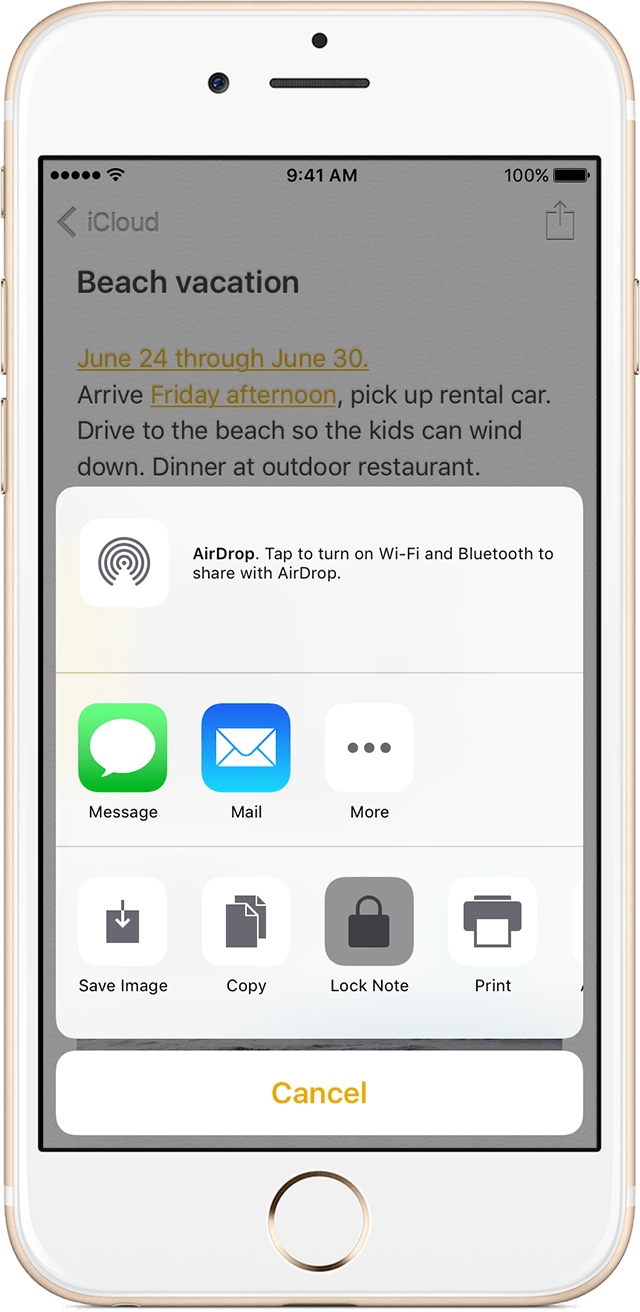
  2. Tap Share icon > Lock Note.
  3. Enter a password, then give yourself a password hint.
  4. Tap Done.

On your Mac

You can create a password on your Mac directly in the Notes app. In the menu bar, click Notes > Set Password. Enter a password, then give yourself a password hint and click Done.

Use Notes password-protection

Whether your note has an image, sketch, map, URL, or list of important information, it's simple to keep it safe with password-protection. And when you need to access your secure notes, you can tell which ones are locked directly from the Notes list. Just look for the  next to the note. Until you enter your password or use Touch ID, you only see the title and the last date that it was edited.
You can't password-protect notes that you share with someone else. If you want to stop sharing a note, open , then tap or click Stop Sharing.
     

Lock a note

On your iPhone, iPad, or iPod touch:
  1. Open the note that you want to lock.
  2. Tap Share icon .
  3. Choose Lock Note.
After you lock your note, it stays open and you'll see unlocked notes icon at the top of the screen. You can hide the note's contents when you tap .
On your Mac:
  1. Open the note that you want to lock.
  2. Click lock notes icon.
  3. Choose Lock Note.
You can only lock notes on your device and notes in iCloud. You can't lock notes that have PDFs, audio, video, Keynote, Pages, Numbers documents, or notes that use IMAP to sync (like Yahoo!, Gmail, and Hotmail).

     

Open a locked note

On your iPhone, iPad, or iPod touch:
  1. Tap the locked note.
  2. Tap View Note.
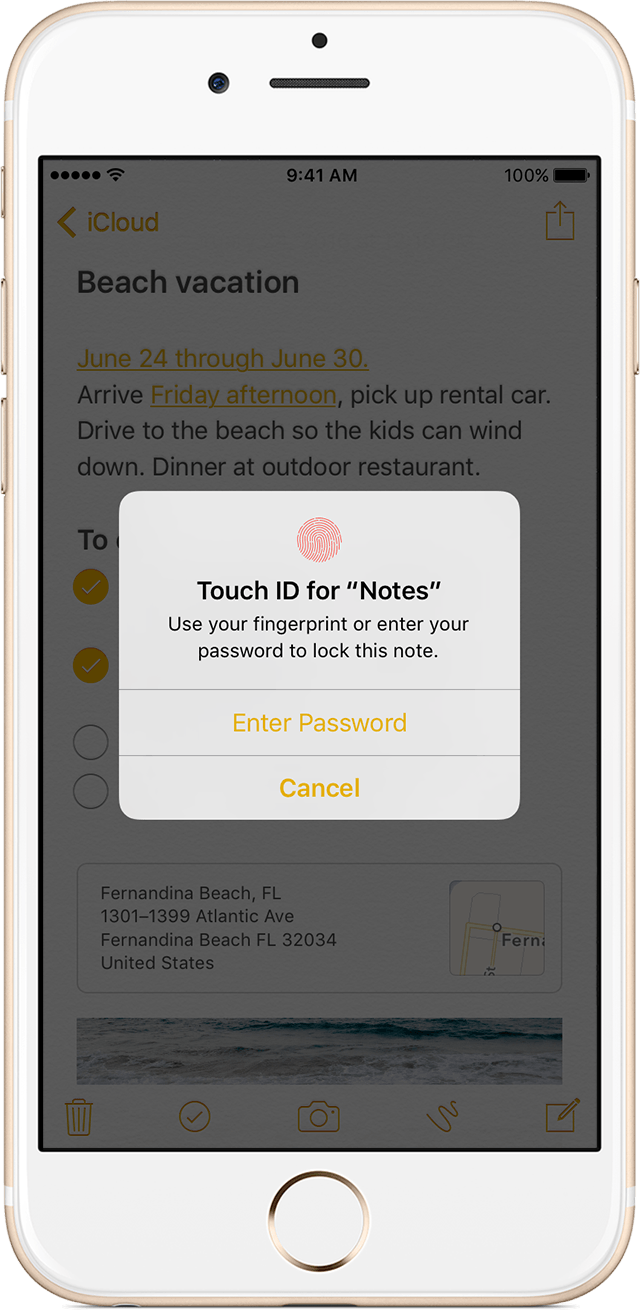
  3. Enter your password or use Touch ID.
On your Mac and iCloud.com:
  1. Click the locked note.
  2. Enter your password.
Your locked notes stay open for up to three minutes, making it easy for you to jump to another note, copy and paste information from other apps, and more. If you close the Notes app or your device goes to sleep, the note locks again.
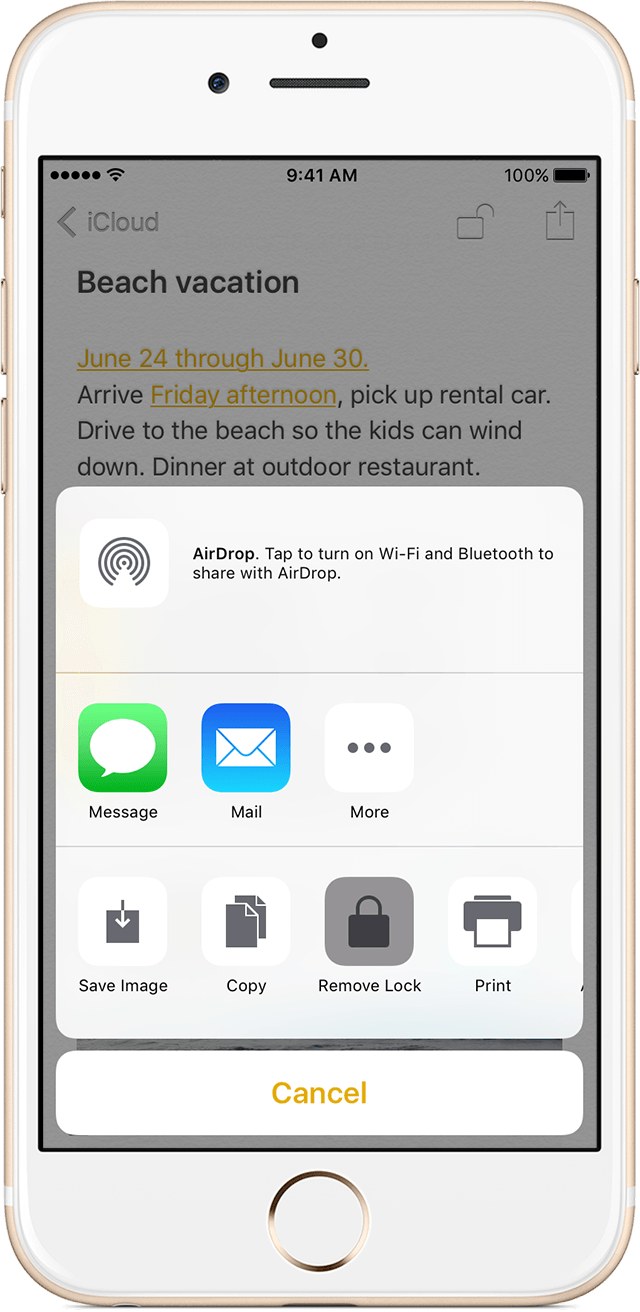
     

Remove a lock

On your iPhone, iPad, or iPod touch:
  1. Tap the locked note.
  2. Enter your password or use Touch ID.
  3. Tap Share icon.   
  4. Choose Remove Lock.
On your Mac:
  1. Click the locked note.
  2. Enter your password.
  3. Click .   
  4. Choose Remove Lock.
When you remove a lock from a note, it's removed on all of the devices that you're signed in to with the same Apple ID.

Change your password

On your iPhone, iPad, or iPod touch:
  1. Go to Settings > Notes > Password.
  2. Tap Change Password.
  3. Enter your old password, then enter a new password and password hint.
On your Mac:
  1. Open Notes.
  2. In the menu bar, choose Notes > Change Password.
  3. Enter your old password, then enter a new password and password hint.
  4. Click Change Password.

If you forgot your notes password

You can unlock a note only when you enter the password that it's locked with. If you forgot your password, Apple can't help you regain access to your locked notes.
You can reset your password, but this won’t give you access to your old notes. It will, however, let you password protect any notes that you create from that point forward with the new password. This could lead to you having multiple notes with different passwords.
If you have multiple passwords, you can't tell which password you should use when you look at your notes in the Notes list. When you open a note locked by your old password but enter your current password, you'll see an alert that you entered the wrong password with a hint for your old one. If you then enter the correct old password, you get the option to update that note's password to your current one.

Reset your notes password

When you reset your Notes password, it doesn't delete or change the password of your notes that are already locked. If you have a note that uses an old password, you can update it to the new password when you enter the old password, remove the old password, then apply your new password to the note.
On your iPhone, iPad, or iPod touch:
  1. Go to Settings > Notes > Password.
  2. Tap Reset Notes Password.
  3. Enter your Apple ID password.
  4. Tap Reset Notes Password again.
  5. Enter your new password and password hint.
On your Mac:
  1. Open Notes.
  2. In the menu bar, click Notes > Reset Password > OK.
  3. Enter your Apple ID password.
  4. Click Reset Password.
  5. Enter your new password and password hint.

Friday, February 19, 2016

Should Apple comply with the order to unlock San Bernardino iPhone?

News broke yesterday that a United States magistrate judge in California ordered Apple to comply with the FBI’s request for assistance in bypassing the passcode lock of the San Bernardino gunman’s iPhone. Hours later Apple published an open letter by Tim Cook explaining that creating a tool to bypass this specific iPhone would jeopardize the security of all iPhones.The battle between personal privacy and information gathering as it relates to Apple and security has been building up for years now, and the government narrowing it down to one specific iPhone used by a terrorist in the U.S. has caused the debate to reach new levels. This may be Apple’s battle to lose, but it will be a very public one nonetheless.Since Apple’s response to the FBI and court order, the White House has stood by the Department of Justice and argued that it’s not about a backdoor for all devices but just a single device, which Tim Cook’s argument already addressed.Tim Cook’s open letter is on Apple’s homepage and headlines about the government’s demands are all over the news.  Tim Cook’s open letter is on Apple’s homepage and headlines about the government’s demands are all over the news. From my view, Apple customers seem to be overwhelmingly in favor of Tim Cook’s position, while presidential candidates are unsurprisingly siding with the FBI. Where do you weigh in? Here’s what we know so far.
iPhones with passcode locks are currently disabled after multiple failed attempts to guess passwords. Try too many incorrect passcodes on an iPhone and you’re temporarily only allowed to place emergency calls for 1 minute. Try again after that and it extends to 5 minutes, then 15 minutes, and so on. Optionally, iPhones can be set to erase all data after just 10 failed attempts.
In Cook’s words, this is how he describes the government’s request:The government would have us remove security features and add new capabilities to the operating system, allowing a passcode to be input electronically. This would make it easier to unlock an iPhone by “brute force,” trying thousands or millions of combinations with the speed of a modern computer.


Thursday, December 31, 2015

Voiceover for iOS let voiceover be your guide

iPad paired with a Braille display in the Notes app.Braille Displays


iOS devices are fully compatible with many refreshable braille displays. You can connect a Bluetooth wireless braille display to read VoiceOver output, including contracted and uncontracted braille and equations using Nemeth Code. And braille displays with input keys can be used to control your iOS device when VoiceOver is turned on.

VoiceOver is a gesture-based screen reader that lets you enjoy the fun and simplicity of iOS even if you can’t see the screen. With VoiceOver enabled, just triple-click the Home button to access it wherever you are in iOS. Hear a description of everything happening on your screen, from battery level to who’s calling to which app your finger’s on. You can adjust the speaking rate and pitch to suit you.


iPhone showing VoiceOver speech output from It's Nice That web site in Safari: 'The intimidating landscapes of the Tour de France captured beautifully by Mark Leary.'

Text Input

Whether you’re composing an email or jotting a note, VoiceOver echoes each character on the keyboard as you touch it, and again when you enter it. Have VoiceOver speak each completed word. A flick up or down moves the cursor so you can edit precisely. To help you type more quickly and accurately, iOS supports multiple character inputmethods — including handwriting — and corrects misspelled words. Enable Speak Auto-text and you hear a sound effect and the suggested word spoken. Keep typing to ignore it, or tap the space bar to have your iOS device type it for you. Pair up an Apple Bluetooth keyboard, and VoiceOver talks you through inputting text in the same way.
iPhone showing the VoiceOver rotor set to move by headings in a Elle Decor web page.

The Rotor

iPhone showing VoiceOver working with autocorrection in the Messages app.
VoiceOver features a virtual control called the rotor. Turning the rotor — by rotating two fingers on the screen as if you were turning an actual dial — changes the way VoiceOver moves through a web page or document based on the setting you choose. When you’re on a web page, turn the rotor to hear settings like “headings,” “links,” and “images.” Then flick to choose how you navigate the page — for example, you can skip from one heading to the next. Move through documents with similar ease. The rotor has settings like “word” or “character” that let you choose how to navigate your text, which comes in handy for checking spelling and grammar. You can customize the rotor elements from a variety of options, including language.


Apps

Because VoiceOver is integrated in iOS, it works with all the built-in apps, including Safari, Mail, App Store, iTunes, Music, Calendar, Reminders, and Notes. You can also create custom labels for buttons in any app — including third-party apps. So it’s even easier to get to your news, word games, or anything else you love on your iOS device. And Apple is working with the iOS developer community to make even more apps compatible with VoiceOver. 

International Voices

VoiceOver includes built-in voices that speak over 30 languages: English (U.S.), English (UK), English (Australia), English (Ireland), English (South Africa), Spanish (Mexico), Spanish (Spain), French (France), French (Canada), German, Italian, Japanese, Korean, Mandarin (Mainland China), Mandarin (Taiwan), Cantonese (Hong Kong), Arabic, Czech, Danish, Dutch, Finnish, Flemish (Belgium), Greek, Hindi, Hungarian, Indonesian, Norwegian, Polish, Portuguese, Portuguese (Brazil), Romanian, Russian, Slovak, Swedish, Thai, and Turkish.

Saturday, December 19, 2015

Assistive technology is any kind of technology and/or tool that can be used to enhance the functional independence of a person with a disability.

Apple just keeps making it better for those who are blind or visually impaired. iOS 8 comes with more features to make it easier for people with low vision or no vision to get the most from their iOS devices. Following you will find misc. information about using the iDevices as assistive technology. I hope you find this guide helpful as you take this journey into the iWorld. Please note: There are new apps coming out every day. This is not a complete guide but more of a jumping off point.


Built-in Accessibility/Functions to explore:
Built-in accessibility features and the development of thousands of specialized apps have made Apple’s iPhone extremely popular among persons with disabilities. Assignable ringtones create an audible caller ID for the blind;  This section explores the IOS accessibility features, including VoiceOver and Zoom, and reviews blind or low vision-specific apps.

There are many built-in features on iDevices that accommodate those with low vision or no vision and help improve productivity. The iPhone and the iPad have some differences here so it is important that you get the tools that best fits your needs. Apple provides a section just on accessibility option worth exploring but also check out the details of many of those built-in accessibility options in the iOS Technology.

Here are the functions we will be covering.
Guided Access,VoiceOver,VoiceOver with Zoom,Zoom,VoiceOver with Maps,Text Completion,Siri,Siri’s ability to launch apps,White-on-Black,Hands Free,Alternate alerts,Custom vibration patterns for alerts
Word highlights in speak selection.

You can find these functions in accessibility. 

VoiceOver,  

VoiceOver, the screen reader for blind and low-vision users, is now integrated with Maps, AssistiveTouch, and Zoom.VoiceOver is a revolutionary screen reader that lets you know what’s happening on your Multi-Touch screen — and helps you navigate it — even if you can’t see it. Touch the screen to hear what’s under your finger, then use gestures to control your device. VoiceOver works with the apps that come with your iPhone, iPad, or iPod touch. 

Siri

Siri, Apple’s intelligent assistant, helps you do the things you do every day.1 All you have to do is ask. Say something like “Tell Jay I’m running late” or “Remind me to make reservations for Saturday.” Siri can send messages, place phone calls, schedule meetings, and even turn on and off VoiceOver, Guided Access and Invert Colors. And because Siri is integrated with VoiceOver, you can ask where the nearest sushi restaurant is and hear the answer read out loud.

Speak Selection

If you have a hard time reading the text on your iOS device, use Speak Selection to read your email, iMessages, web pages, and books to you. Highlight text in any application, tap Speak, and Speak Selection reads the selected text aloud. You can adjust the voice’s dialect and speaking rate, and have words highlighted as they’re being read.

Dictation

Dictation lets you talk where you would type. Tap the microphone button on the keyboard, say what you want to write, and your iOS device converts your words (and numbers and characters) into text. So it’s easy to type an email, note, or URL — without typing at all.

Zoom

Zoom is a built-in magnifier that works wherever you are in iOS, from Mail and Safari to the Home and Lock screens. And it works with all apps from the App Store. A simpledouble-tap with three fingers instantly zooms in 200 percent, and you can adjust the magnification between 100 and 500 percent. While you’re zoomed in, you can still use all of the familiar gestures to navigate your device. And Zoom works with VoiceOver, so you can bettersee — and hear — what’s happening on your screen.

Font Adjustments

When you activate Larger Dynamic Type, the text inside Calendar, Contacts, Mail, Messages, Notes, and even some third party apps, is converted to a larger, easier-to-read size. And you can choose bold text to make the text heavier across a range of built-in applications.

Invert Colors and Grayscale

If a higher contrast helps you better see what’s on your display, iOS lets you invert the colors onscreen. Once you set your colors, the settings apply systemwide, even to video, so you get the same view no matter what you’re seeing.
Braille Displays for iOS  It’s easy to use a braille display with your iOS device. More than 40 Bluetooth wireless braille displays work right out of the box with iPhone, iPad, and iPod touch. And iOS includes braille tables for multiple languages. Learn more about iOS braille displays         

Apps for Visually Impaired:
 It is always good to do a little research on an app before purchasing it. Do a search and see if you can find some reviews or talk to others to see if they have tried it. This could save you a lot of money as some apps are just not appropriate or what you might be hoping for. Watching YouTube videos of the app in action i always worth while. 
explored and found, what I feel to be, a couple of great resources for apps for the Visually Impaired:

Apps for the Blind and Visually Impaired -  highlights some of the most innovative apps available.
Gradients of Sight has provided a listing and review of each.
 Magnification and Vision Support listing by Spectronics.com is also a good guide.
spectronics.com has a listing of apps for people who have low vision, and teachers of students who have a vision impairment.
 iPhone iPad apps for the blind and visually impaired blog highlights some of the most innovative and entertaining apps available to the vision impaired.

Not assistive technology but may be worth exploring is: Apps that can aid in Visual Skills
Voice Dream Reader app  provides text-to-speech that lets you listen to any articles, blog posts, reports, papers, and books. It reads the text using the best available text-to-speech technology. You can add it to your Book share account easily. VDR allows for many color options, the Text-To-Speech can be set for wpm, and I think you will like the reading screen feature. 
ViA is a new app from Braille Institute that fills a real need for families with children with visual impairments... it helps you find apps that are accessible and appropriate for blind users! 


Please note that many of the apps in this section would not be considered LV but more instructional.
App Writer US  is an app which is a text editor for the iPad with word prediction, text-to-speech, OCR, and a special font for people who are Dyslexic.
PaperPort allows you to import pictures, documents, items from dropbox, etc. and then either type, write or use speech recognition into text boxes. A digital note taking tool, allowing the user to combine documents, web content, audio, typed text, and handwritten notes into a single document that can be shared.
SoundNote is an iPad alternative to smart pens like LiveScribe, but without the need to purchase a special pen. (It is specific to the iPad and is not available on the iPhone.) It allows you to record audio while you hand write notes with your finger, stylus, or keyboard to take notes during classes, conferences, meetings, etc. When you are finished, simply go to the section of your notes that you want to review and you are immediately taken to that section of the audio as well. 
Voice Dream Reader app  provides text-to-speech that lets you listen to any articles, blog posts, reports, papers, and books. It reads the text using the best available text-to-speech technology. 

Reading Supports to research:
There's a lot reading supports available from resources such as-
iBooks (come with iDevices)
iBooks for Textbooks (This will be big!)
Learning Ally
Talking Books from the National Library Service
Apps that offer highlighting while speaking the text:  Speak It. A great reading app called Voice Dream Reader can be used with Pocket (or Instapaper). With a webpage, save it to pocket then open Voice Dream Reader which imports all webpages saved in Pocket. Voice Dream Reader ighlights the line which is being read aloud. VVoice Dream Reader uses Acapela voices.
Voice Dream Readerapp  provides text-to-speech that lets you listen to any articles, blog posts, reports, papers, and books. It reads the text using the best available text-to-speech technology. 

Apps for Organization and Productivity:
This is a huge category and there are many, many apps to provide support in these areas. This is one of the main supports I (and many others) use my iPad and iPhone for. I often wonder how I ever stayed organized before my iDevices became part of my life. 
The built in calendar with reminders is probably the most important tool you can use. You can set it to remind you of your appointments in various time increments. It will beep, give you a visual cue...remind you more than once!! It is crucial to use this wonderful tool if you are someone who has any type of life with things you need to remember!
Evernote is perfect for taking quick voice, text, and image notes to use later. The app can also sync with Evernote’s desktop and web versions. Evernote gives whole new meaning to the word “synchronized.” This software uses technology to help organize various types of information from several different sources into one, central, web-based location. The product also allows you to clip web pages and archive them for later reference, store screen shots, photos and text notes, all within a customizable storage system. Evernote will organize things for you by the date a note or other document was created.It is a must have.


Note taking Apps: 
(That sync audio and notes at the individual note level- clicking within text or a drawing, jumps to that place in recording so that the listener does not need to listen to the whole recording playback.) 
Audi olio
AudioNote
Audiotorium Notes
Notability
NoteBook for iPad
PaperDesk
PaperPortNotes
SoundNote

Here is more links.were you can find more apps and videos for the  blind and visually impaired.
My blog iPhone iPad apps for the blind and visually impaired gets updated once or twice a week. If you'd like to get updates please use the follow by e-mail feature. Or use the contact form provided and let me know if you would like to receive updates. http://iphoneandipadappsfortheblind.blogspot.com/search/label/iPad
My Pinterest pin board changes weekly so keep your eye out for more pens.https://www.pinterest.com/chelseaastark/iphone-and-ipad-apps-for-blind-and-visually-impair

Also check out The History of Apple i Phone's blog.
http://thehistoryofappleiphones.blogspot.com/
You can also join the Facebook group titled iPhone iPad Apps for the Blind VisuallyImpaired it is a fun Group to ask questions and learn new things. We are always happy to add new members.

https://www.facebook.com/groups/iPhoneiPadAppsfortheBlindVisuallyImpaired/

Monday, July 6, 2015

AllAccess.US: Scan Logos, Access Menus, Deals & More!


All Access: SCAN LOGOS & QR CODES to Access Menus/Deals/Coupons by AllAccess.US

SCAN LOGOS TO ACCESS TALKING MENUS, DISCOUNTS, COUPONS, TICKETS, DIRECTIONS & MORE! You can scan QR Codes or ACTUAL LOGOS! Or browse for local businesses by name or category! The app has access to over one million menus & 2,000+ logos! Add your brand's logo & info by contacting us at AllAccess.US!

Wednesday, April 1, 2015

Navigating your iOS Device

Navigation Basics
Now that you’ve taken your first step into the iOS world with multitouch gestures, it’s time to learn how to navigate your device. We’ll go over where your apps are stored, how to organize them, search for them, and delete them.
The Home screen: When you first turn on your device, you’re brought to the Home screen. Here, you’ll see an assortment of icons grouped into rows, and several more icons grouped in the silver Dock along the bottom of the screen. The Home screen is where your apps live, and where you can launch them. Because only 16 apps will fit on one Home screen (20 on the iPad), you can have multiple app pages or screens for organizing your apps (up to 11). Above the Dock, you’ll see a series of dots, with one highlighted in white; these dots signify the number of app pages you have. Swipe left or right to go from page to page.
The Dock: The silver translucent bar along the bottom of your Home screen is called the Dock. If you’ve tried swiping between app pages, you’ll notice the icons in the Dock don’t change. That’s because the Dock is for apps you most frequently use; instead of having to swipe from page to page to find an app, you can drop it directly into the Dock for easy access. You can store up to four apps in the Dock.
Search in Spotlight: You can search for every email message, webpage, and app on your device, or search through Google or Wikipedia, by swiping right on your Home screen until you reach Spotlight. (If you're on the first Home screen page, pressing your Home button also summons the Spotlight screen.) To search, just type your query in the text box at the top.
Open and close an app: Want to launch an app? To open it, all you have to do is tap its icon. Once it’s open, you can return to the Home screen at any time by pressing the Home button.


Tap and hold on an app icon to enter edit mode, where you can rearrange apps, add them to folders, and delete third-party programs from your device.

Rearrange and delete apps: To rearrange the order of your icons, tap and hold any icon on the Home screen. After a few seconds, all your app icons, including the one you’re holding, will start to wiggle, and a small black X will pop up in each icon’s top left corner. Once they do this, you can rearrange any apps on the Home screen, or even drag them into or out of the Dock. If you’ve installed a third-party app you don’t want anymore, you can tap the X to delete it (you cannot delete the apps that came preinstalled on your device). When you’re finished, press the Home button, and your icons will stop wiggling and stay in their new location. You can also rearrange your icons and Home screen pages through iTunes when you connect your device to your computer.
Note that you’re not able to delete the built-in apps that come with your iOS device. These include Camera, Photos, YouTube, Clock, Weather, and the all-new Newsstand folder, among others. You’ll be able to tell which apps you can’t delete—they don’t sport the black X. You are able to move around these built-in apps to your liking, however.
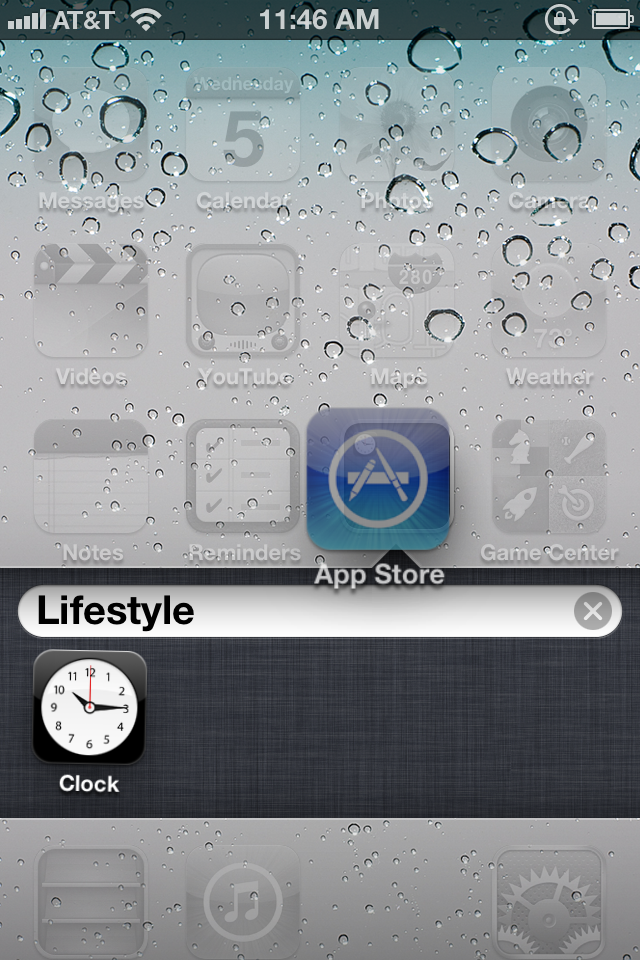
Use folders: Having a bunch of apps scattered on your Home screen is OK if you don’t have too many, but when you start amassing a collection, you can use app folders. A folder is a group of apps, represented by a single icon, on your Home screen. Each folder sports miniature icons representing the apps inside, along with an overall name. When you tap a folder, the Dock fades and slides down, making room for a view of the folder’s contents. Within, you’ll find the name and icon for each app. Tap any app to launch it, or tap anywhere outside the folder to return to the Home screen.


Drag an app icon on top of another app icon to create a folder.

To create a folder, start by tapping and holding any app icon to enter edit mode; after the icons begin to wiggle, drag an app on top of another app. When you release the app, you’ll create a folder, which will open and display both apps. By default the folder is named based on the App Store category for one of the first two apps in the folder. If you want to customize this name, just tap inside the field (while still in edit mode) and enter something new. When you’re done, press the Home button to exit edit mode.
To add another app to the folder, reenter edit mode and drag the desired app onto the folder icon. Repeat until you’ve added all the apps you want (up to 12 per folder on the iPhone or iPod touch; 20 on the iPad), and then press the Home button to exit edit mode.
To edit the folder itself, its name, contents, or the layout of the apps inside, you can either enter edit mode and then tap the folder, or, while the folder is open, tap and hold any icon inside. You can then tap the folder’s name to change it, drag apps within the folder to rearrange them, drag an app out of the folder to return it to the Home screen, or tap an app’s Delete button to completely delete it from your device. Unlike apps, folders don’t have a Delete button; to delete a folder, you must remove all the apps from it.


You can rearrange your apps, add folders, and remove programs through iTunes.

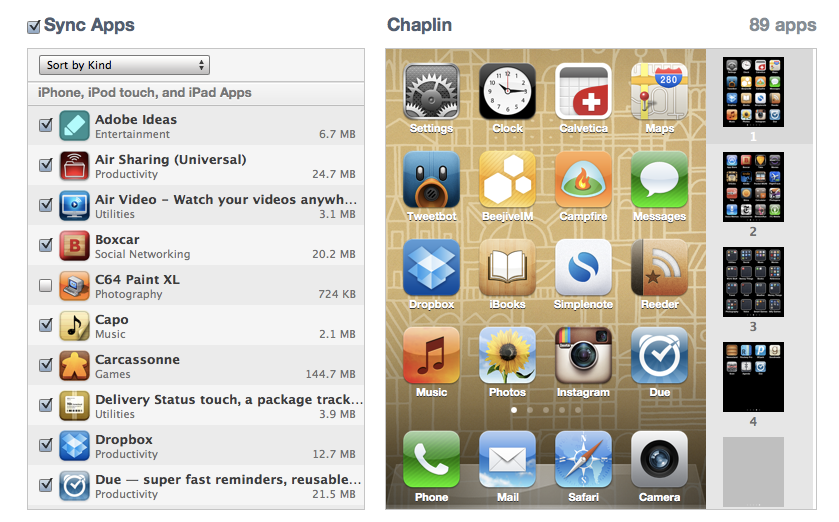
Manage folders from iTunes: iTunes has long allowed users to manage installed apps when syncing, and you can edit your folders too, using your mouse and keyboard. When your device is connected to your computer, the Apps tab in iTunes lets you choose which apps to sync, as well as decide how to organize these apps. Drag an app onto another app and, after a slight delay, a folder is created—just as if you’d performed the same action on your device. You get the same editable folder name, and you can rearrange icons within the folder. Since you’re using a computer, you don’t need to click and hold to enter the jiggling-icon edit mode; you can click and drag anytime. Similarly, to edit an existing folder, just double-click it.

Multitask on your iOS device

Opening and closing an app is easy: Tap the app to open it, and then press the Home button to close it. But when you exit, you’re not actually shutting down the app: You’re freezing it in place, or sending it to run in the background. This means you can have multiple active apps running at any one time, and you can even switch between active apps without returning to the Home screen.


Double press the Home button to pull up your device's multitasking bar.

Frozen apps versus background apps: Sometimes you need an app to keep doing something when it’s not in the foreground. For that reason, Apple allows apps to perform tasks in the background using several tools. One of these tools is the push-notification system; another allows music apps to keep playing while the user switches to another app; yet another allows tasks, such as photo uploads, to continue running in the background even if you switch out of the program performing the upload. If your third-party app doesn’t incorporate one of these background features, it will “freeze”, which is to say it will remember whatever you were just doing when you re-open it, but will not process any data in the background.

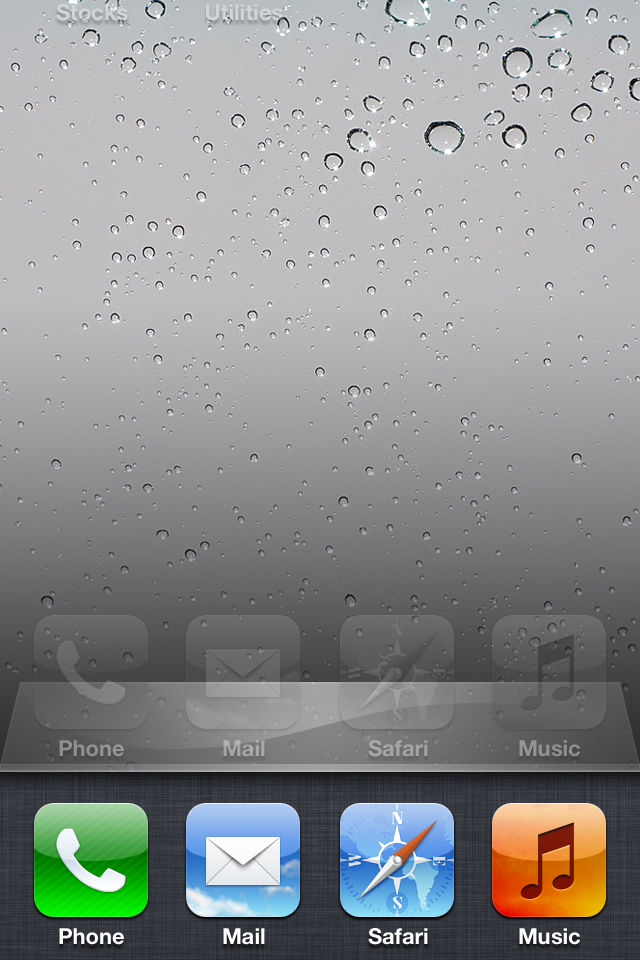
The multitasking bar: You can quickly switch between apps by bringing up the multitasking bar. To do so, quickly double-press the Home button; a bar below the Dock will rise up from the bottom of the screen, showing off the apps most recently run. To switch to a different app, tap its icon.
Multitasking shortcuts: In addition to holding a list of your most recently used apps, the multitasking bar has a couple of other neat shortcuts for your device. 
If you swipe up from the bottom with one finger, you’ll bring up a secondary set of controls. On the iPhone or iPad, you can control the music currently playing on your device,  (it defaults to the Music app, but you can also control music from third-party apps). 
device's brightness, slider for controlling volume.  Airplane mode, wi-Fi, bluetooth, do not disturb, AirDrop, flashlight, Calculator, camera, lock.

Tuesday, March 31, 2015

Yocto Alarm Clock

Yocto Alarm Clock


Attractive, very full-featured and completely free with no ads! Contains awesome wake-up alarms, magical sleep timers, an eye-catching clock display and plenty of configurable options.
Wake up to a built-in melody (over 70 high quality sounds, from practical to fun to whacky).• Wake up to a custom playlist from your iTunes library.

Full support for fade-out, snooze, vibrate, volume control, backup alarm, and much more. Power Nap mode allows you to instantly set a custom alarm for 5 minutes to 1 hour from the current time.
Sleep Timers
Built-in soundscapes (looping sounds) get you to dreamland in no time flat. Create a custom playlist from your iTunes library. External Audio Mode. Use other apps to play audio (such as internet radio) and Yocto Clock will fade-out and stop the audio when the sleep timer expires. Sleep Timers feature a unique audio book / podcast mode. Listen to audio for a specified time, then gently switch to sleepy-time music.
Other Features
Sophisticated clock display, fully configurable. Weather forecast and current conditions.  A fun selection of fonts for the time display. Make the text any color you wish. Choose from built-in wallpaper or select from your own photo library. A full range of gestures to control the app from the clock display. An easy-to-use flashlight mode.
- Screen dimming. Many configurable options. 
Plus...
A built-in Mini User's Guide to help you get the most from Yocto Clock. Full support for devices with Retina displays. Full VoiceOver Accessibility support.  A Universal App with full native support for the iPad. Yocto Clock is designed for Apple iPhone, iPod touch and iPad devices.  Get your copy today from the iTunes App Store.

Thursday, November 13, 2014

How to Stop Other Devices Ringing When iPhone Gets a Phone Call

If you have multiple devices running iOS 8 and using the same Apple ID, you’ve probably noticed that an incoming phone call rings on every one of the devices at the same time. In other words, an inbound phone call will ring not only your iPhone, but also any other iPad, iOS device, or Mac too if it’s running OS X Yosemite. While this feature can be convenient and make it much less likely that you’ll ever miss a phone call, it can also be a nuisance if you have a desk full of hardware that is all buzzing simultaneously.
To stop the iPhone from ringing your other devices with an incoming phone call, you need to visit the Settings of the iPhone which has the cellular connection that originally receives the phone call. You can also choose to selectively disable the ringing feature on other devices if you’d like to just opt a single device out. Here’s what you’ll want to do:
  1. Open the Settings app on the iPhone and go to “FaceTime”
  2. Toggle the switch for “iPhone Cellular Calls” and flip it to the OFF position
  3. Exit out of Settings as usual

This puts an end to the multiple device ringing feature. 
It’s worth mentioning that if you turn this feature off you can’t make phone calls from your Mac or other iOS device by way of your iPhone cellular connection. Despite being in the FaceTime settings, it has no effect on standard FaceTime audio calls made from a Mac or FaceTime VOIP from iOS, and FaceTime video chat still works as usual too.
Separately, you can choose to disable the iPhone calling feature on the Mac as well. 
Keep in mind there is a physical proximity limit with this feature, so if you’re many miles away from your other devices, your iPhone isn’t going to ring the hardware left at your office or home. Apple hints at this in the settings with the toggle switch, describing the feature as follows: “Use your iPhone cellular connection to make and receive calls on devices signed into your iCloud account when they are nearby and on Wi-Fi.”

Thursday, October 23, 2014

How to use iOS 8 Continuity between your iPhone & iPad for calls,texts, apps & more

Wen  you updated to iOS 8, recent iPhones and iPads will play nicely with each other, allowing users to do new functions like answering a phone call or sending an SMS message via their iPhone without having to put down their iPad, or start an email on one device before finishing it on the other.  
Please note that some devices are having issues using the Continuity feature. 


Apple has dubbed this seamless integration "Continuity," and some of it works immediately once all of a user's devices are updated to iOS 8. For example, if a user has the same Apple ID and associated phone number enabled on their iPad, calls will show up on the tablet once the iPhone begins ringing.

Answering a call on an iPad automatically places the conversation in speakerphone, allowing the iPad's microphone and speakers to handle the call. Continuity requires an iPhone 5 or later, fourth-generation iPad or newer, iPad mini, or fifth-generation iPod touch.


iOS 8 also allows users to automatically enable Personal Hotspot from a nearby iPhone, in a feature Apple calls "Instant Hotspot." A Continuity-capable iPhone will appear under the Wi-Fi section of the Settings app on iPad, and selecting that device will switch Personal Hotspot on, allowing a user to access mobile data from their cellular provider when possible.


The iPad also gains the ability with iOS 8 to send traditional SMS text messages via a connected iPhone. Previously, users could only said iMessages to Apple devices. While SMS messaging was available to test in iOS 8 beta releases, it is not included in the final release, and Apple has said it will become active in October.

All of this same functionality will be coming to newer Bluetooth Low Energy capable Macs later this year with the launch of OS X Yosemite, which will also be a free update.


Additional Continuity features in iOS 8 are available by enabling the "Handoff" feature. Users can do this by opening the Settings application, choosing General, and then selecting "Handoff & Suggested Apps."

"Handoff lets you start something on one device and instantly pick it up on other devices using your iCloud account," Apple's description reads. "The app you need appears in the lock screen, app switcher, and the dock on a Mac."


For example, if a user is reading a website on their iPhone running iOS 8, they can quickly switch to their iPad by swiping up from the small Safari icon that is displayed in the lower right corner. Doing so will immediately open the same website on the iPad.

In addition to Safari, this functionality works immediately with Mail, Pages, Numbers, Keynote, Maps, Messages, Reminders, Calendar, and Contacts. Developers will be able to add Handoff into their own third-party apps as well.


The "Suggested Apps" function also utilizes a user's location to recommend applications. For example, if a user is at a Best Buy retail store, iOS 8 will display an App Store icon in the lower left corner of their iPhone lock screen. Swiping up will take the user to the App Store listing for the official Best Buy app.

If the Best Buy application is already installed, the icon for it will be displayed in the lower left corner, giving the user quick access to the app while they are in the store. This will help expand iBeacon functionality, which requires third-party applications to be installed to access unique functions.